If you’re looking for a way to backup a WordPress site for free, then UpdraftPlus is definitely one of the most popular and well-rated options. Not only does it let you manually take a backup, but it can also automatically backup your website to the cloud on a schedule of your choosing, as well as easily restore a backup with just a few clicks.
In this tutorial, we will take you step by step through the UpdraftPlus setup procedure and explore the different features and settings available.
At the end of this post, you’ll know exactly how to backup a WordPress site for free with UpdraftPlus.
A quick overview of UpdraftPlus
UpdraftPlus is extremely quick and easy to set up. It works by backing up your website directly into the cloud, to a solution of your choice. These include…
- Dropbox
- Google Drive
- Amazon S3
- RackSpace Cloud
- DreamObjects
- OpenStack Swift
- Updraft Vault
UpdraftPlus’s intuitive interface will enable you to schedule automatic backups, backup files, databases, plugins and themes, and restore your backups directly from your WordPress control panel.
Installing UpdraftPlus
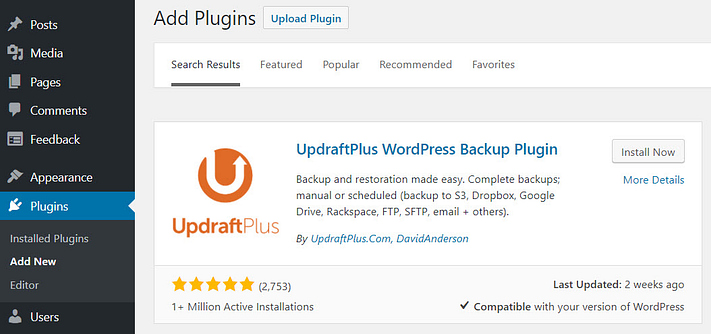
To backup a WordPress site for free, you will first need to install the UpdraftPlus plugin. To do so, open your WordPress dashboard, and select Plugins > Add Plugins from the menu bar.
Then type UpdraftPlus into the Search Bar. Select the UpdraftPlus WordPress Backup Plugin and click Install Now > Activate.
Setting up UpdraftPlus to backup a WordPress site for free
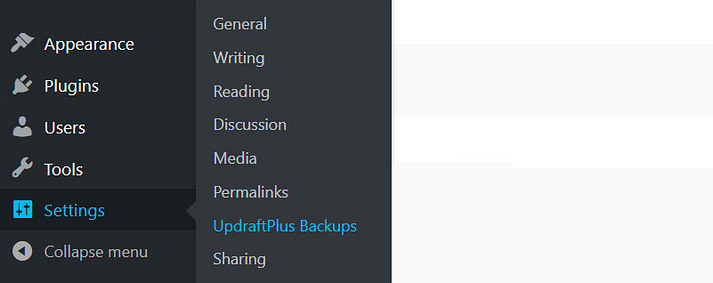
To set up UpdraftPlus, select Settings > UpdraftPlus Backups from your WordPress menu.
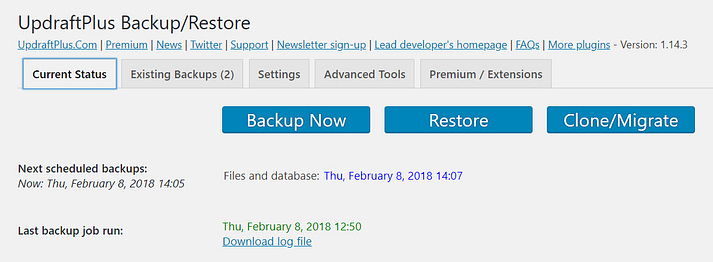
This will open the UpdraftPlus Backup/Restore page, where you can customize the UpdraftPlus settings to suit your backup needs. Let’s take a look at what you can do…
Backup manually
In the main dashboard, UpdraftPlus lets you manually backup your WordPress website at any time. To do so, simply click on the Backup Now button.
You can either download the manual backup to your local server or have UpdraftPlus automatically upload it to a remote storage location (more on this in a second).
Configure scheduled backups
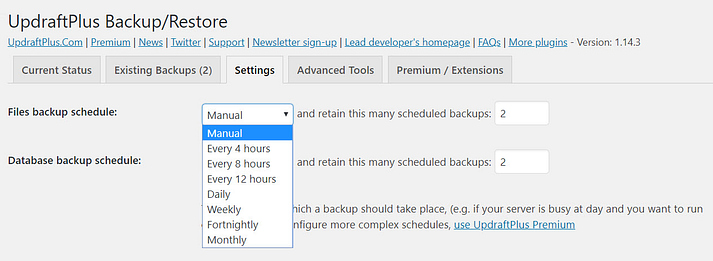
To save yourself the trouble of remembering to manually backup, UpdraftPlus lets you create your own automatic backup schedule. To set up scheduled backups, select the Settings tab on the UpdraftPlus Backup/Restore page.
Here you can choose how often to backup your database and files. Options include…
- Every 4, 8 or 12 hours
- Daily
- Weekly, fortnightly, or monthly
Your selection will depend on how often you update your site. For example, if you are adding content on a weekly basis, then backing up weekly will probably be enough for your site. You can also choose how many previous backups to save.
When you are happy with your backup schedule settings, remember to click on Save Changes at the bottom of the page.
Choose your remote storage location
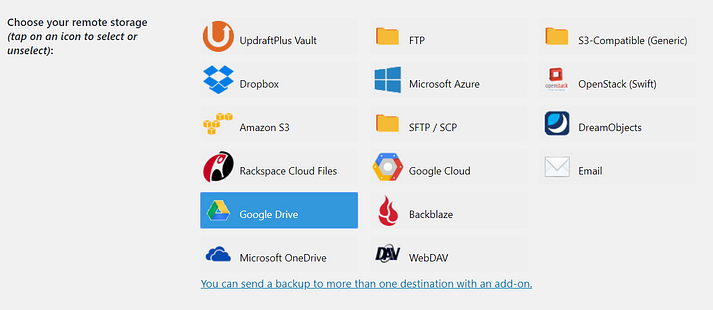
UpdraftPlus integrates with numerous remote storage solutions, so you have a varied choice in backup locations. Select the Settings tab again and scroll down the page to Choose your Remote Storage.
Next, click on an icon to select the remote storage location that you would like to use. The integration settings for the solution you have chosen will then appear further down the page.
Each storage solution has a different integration process so simply follow the instructions provided. For the sake of this article, we have chosen to backup to Google Drive. To do so, select the Google Drive icon and then select Save Changes at the bottom of the page. You will now see this popup.
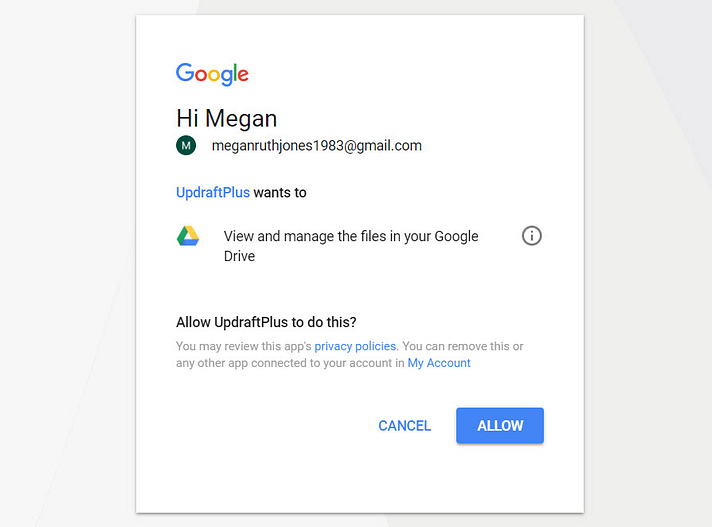
Click on the link in this popup. You will be asked to log into your Google Account. Then click Allow to enable UpdraftPlus to view and manage the files in your Google Drive.
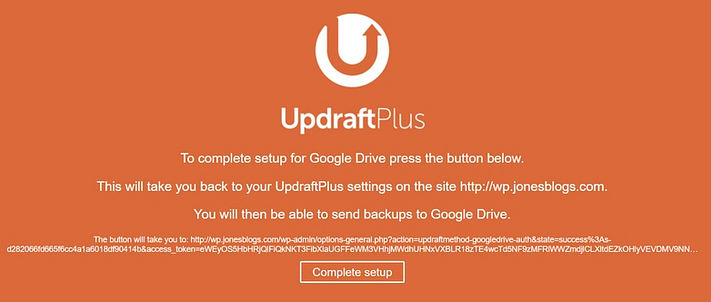
The last step is to select the Complete Setup button to connect the two solutions.
All backups will now be stored directly in your Google Drive.
If you want to backup to more than one location, you can do so by upgrading to UpdraftPremium. Or you can purchase the individual premium add-on, Multiple Storage Destinations.
Restore backups
There may be times when you need to restore a backup. This is an extremely easy process that takes just a few minutes and a couple of clicks of the mouse.
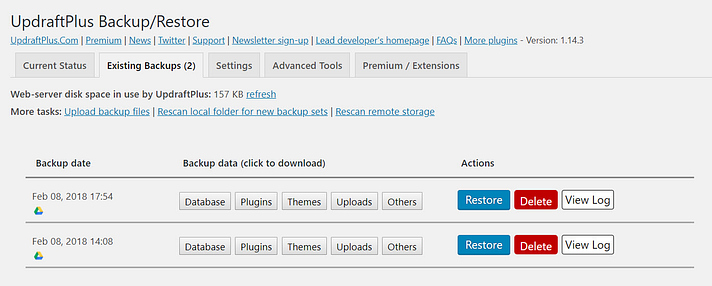
So to get started, select the Existing Backups tab. Here you can view previous backups.
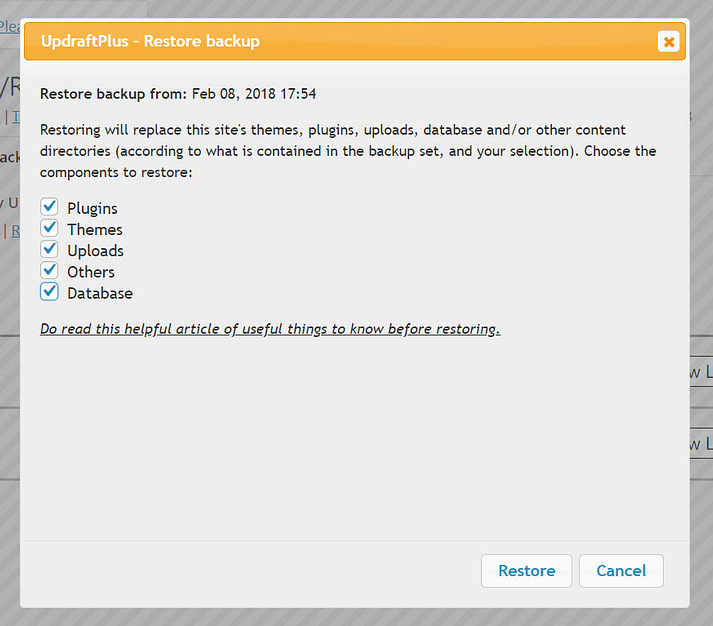
To restore a backup, click Restore. You can also manually upload files by clicking the Upload backup files link.
Next, you will be asked to select which components you would like to restore. These consist of…
- Plugins
- Themes
- Uploads
- Others
- Database
The components you choose will depend on your restore needs. But if you want to restore your entire site, you will need to select all five options.
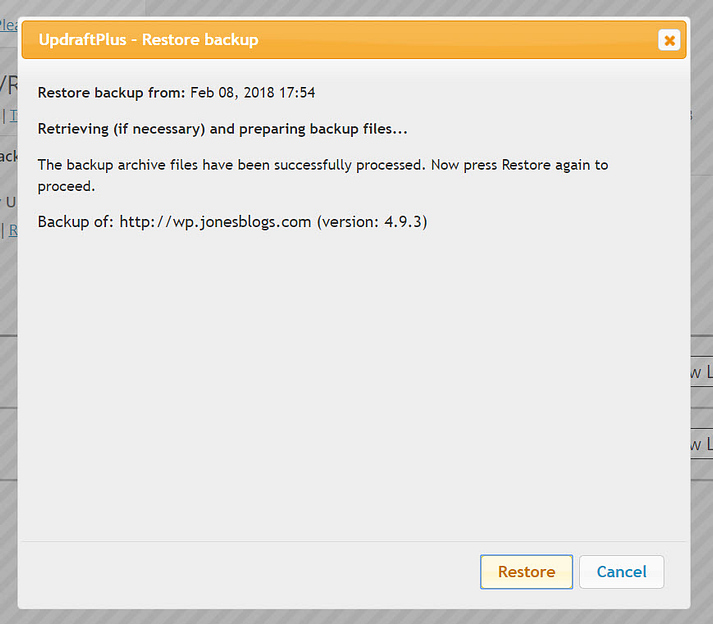
Once your files have been retrieved from your remote location, you will need to follow the instructions in the popups. This isn’t difficult and simply involves clicking on the Restore button a few more times when it is presented.
When completed, a message will display telling you the restore has been successful.
UpdraftPlus Premium
As mentioned earlier, to add advanced functionality to this backup solution, you can upgrade to UpdraftPlus Premium. Here are a few of the features it includes…
- Cloning and Migration – Updraft Migrator can clone your WordPress website and migrate it to a new domain with minimum hassle.
- Pre-Update Backups – Have your website automatically backed-up before any updates to WordPress, your theme or any plugins.
- Network / Multisite – Backup WordPress Multisite networks.
- Additional Remote Locations – Choose to backup to Microsoft OneDrive, Microsoft Azure, Google Cloud Storage, and many more.
- Timed Backups – Set exact times to backup, rather than just a general schedule.
Final thoughts on how to backup a WordPress site for free
If you are looking to backup a WordPress website for free, then UpdraftPlus is a must. Its advanced tools and features make it easy to set up and use. And importantly, it ensures your site is safe and secure if the worst does happen.


