Have you ever tried replacing an image that you uploaded in WordPress? If you did, then you probably had to upload a new file, rename it, and insert it into the post while replacing the old file. Now wouldn’t it be nice if you could do all of this with just few clicks? In this article, we will show you how to easily replace attachment files in WordPress.
First thing you need to do is install and activate the Enable Media Replace plugin. Once activated, it works out of the box, and there are no settings for you to configure.
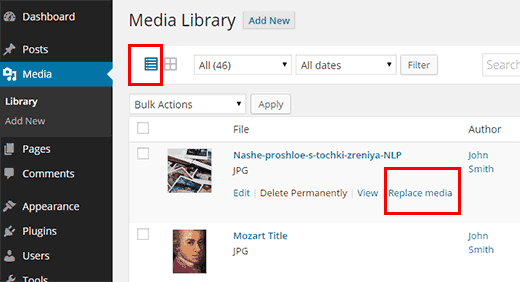
All you need to do is visit Media » Library in your WordPress admin area. If you are using the grid-view, then you would need to switch to the list view.
Now locate the file that you want to replace. Once you found the file, take your mouse near the file name, and you will see a link labeled ‘Replace Media’.
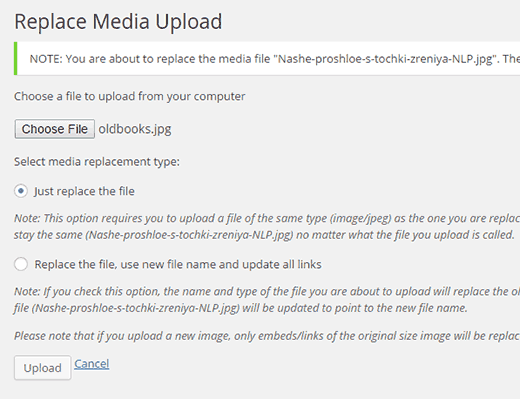
When you click on the link, it will take you to replace media page. There you need to upload your new file by clicking on the Choose File button.
Once you choose the file, you have two options that you can choose. You can choose to only replace the file, or you can replace the file, use new filename, and update all links pointing to the old file.
After choosing one of the options, simply press the upload button.
WordPress will now upload your media file, and the plugin will replace the old media file. If you opted to use new filename and update links, then the plugin will take care of that as well.
You can now visit your posts or page where you had this media file attached and see it replaced with the new file you just uploaded.
We hope that this article helped you find an easier way to replace attachment files in WordPress.


