WordPress and Google Forms
What happens when you add the flexibility and customizability of WordPress with the ease of Google Forms? Maximum usability. This is because both WordPress and Google Forms are widely used and understood systems. Google Forms efficiently helps you to collect information from your user base and integrate it with your Google Drive, something you probably already use on a daily basis. Although WordPress is chock-full of form plugins, Google Forms can help keep you quickly and easily keep track of responses using a system you are already familiar with.
Why Use Google Forms with WordPress
Using Google Forms, you can easily create online surveys, quizzes, and registration forms. The app, found in the Google suite, produces real-time responses, allows the insertion of media items, contains customizable, powerful features and comes with tons of add-ons. The beauty of integrating Google Forms and WordPress is that it allows for you to share the same form on multiple WordPress websites, email lists, etc. and receive responses in the same place. The integration will give your form a degree of automation and universality.
Google Forms to WordPress Integration
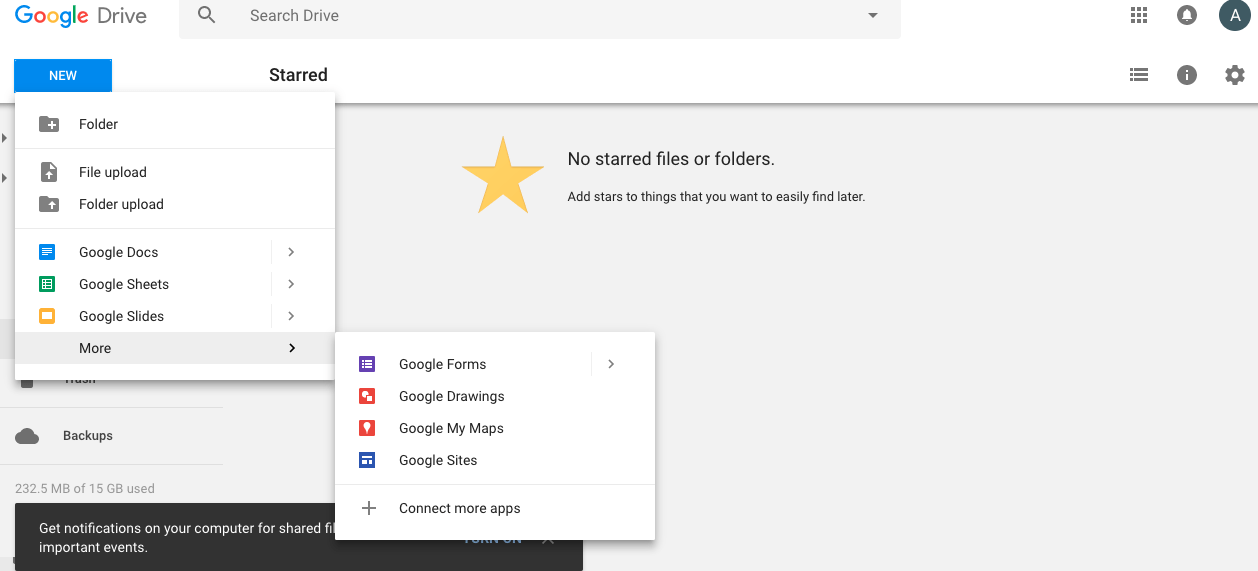
In order to insert an existing Google Form into a WordPress site, you’ll first need to create a Google Form. To do this, log in to your Google Drive and find Google Forms.
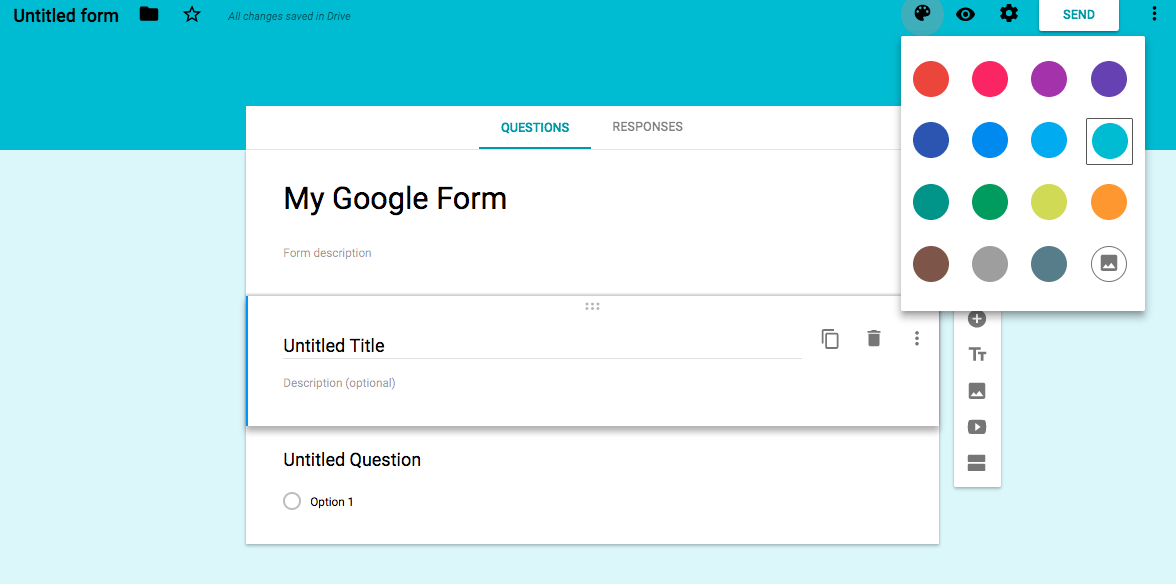
When designing your form, you’ll want to consider what you want it to look like on your WordPress site. Will you want specific colors? How can you make your Google Form fit with your WordPress site seamlessly? Within the Google Form, you’ll be able to adjust the color scheme, select a theme, and adjust font size.
How to Embed a Google Form in WordPress
Once you’ve successfully designed your Google Form, you are ready to integrate it with your user-facing WordPress site in order to collect responses. The fastest and easiest way to do this is by embedding the form’s iframe code directly onto your website.
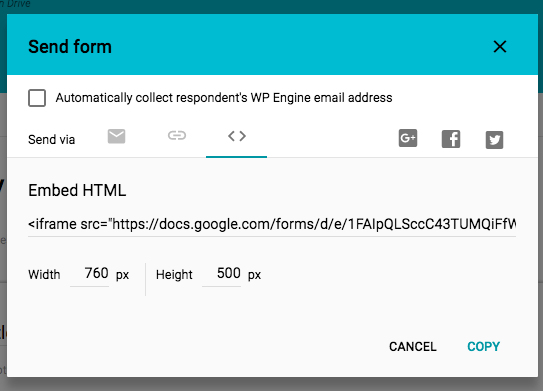
To to this, find Send in the upper-right corner of your Google screen. You’ll see a Send form pop-up appear on the screen prompting you to select how you’d like to send the Google Form. Switch over to the Embed HTML option (two-outward facing carets symbols) and copy the iframe code to your clipboard.
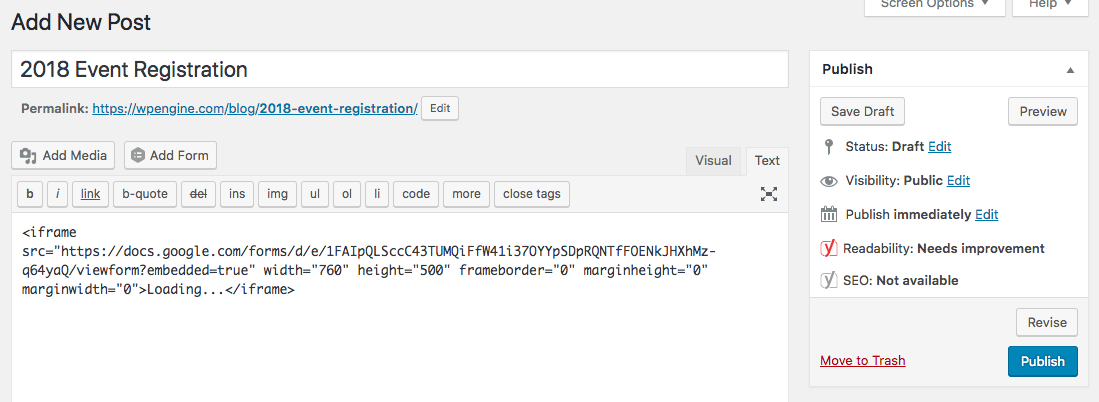
Next, log in to your WordPress website and navigate to where you’d like to add the Google Form. Open up the HTML text editor and paste the iframe code into it.
Now you’re ready to save the post or page draft and preview what it looks like on WordPress.
Adding Additional Google Forms Options for WordPress
Depending on your preferences, Google Forms has plenty of options to take your from to the next level. To do this, however, you’ll need to use the Google Forms Plugin. The Google Forms plugin allows you to manage and edit forms from the WordPress admin area and gives you many options for extending and customizing your Google Form:
- Columns: Split up form responses to as many as 10 columns
- Captcha: Add a boost of security and keep spambots from trying to submit spammy responses by adding CAPTCHA to your WordPress form.
- Read-only: The options allows the form to be read-only and not written on.
- CSS Prefix: Adding a prefix to the beginning of each class name in a Google form can be used to style multiple forms differently.
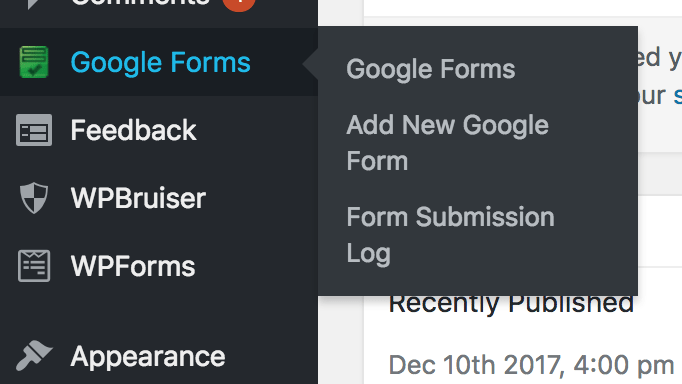
To integrate forms forms using the Google Forms plugin, select Add New Google Form straight from the admin page or select an existing Google Form from your Google Drive.
You’ll need a form created already so that you can fill the Form URL field. You are also encouraged to fill out the Confirmation URL field since the default is generic.

