
Google Cloud Platform is a powerful cloud hosting service for enterprises and developers.
If you’ve decided to give it a try, this guide will take you step-by-step through the process to connect a domain and install WordPress. It doesn’t take very long, and it can be done without support (there’s none available unless you pay anyway).
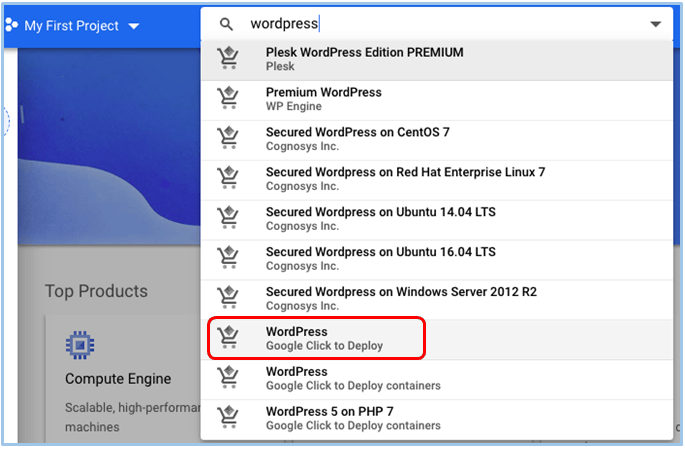
Step One: Select the WordPress Installer
Once you’ve logged into your Google console, enter WordPress into the search bar at the top. This will bring up a long list of WordPress options. Select Google Click to Deploy.
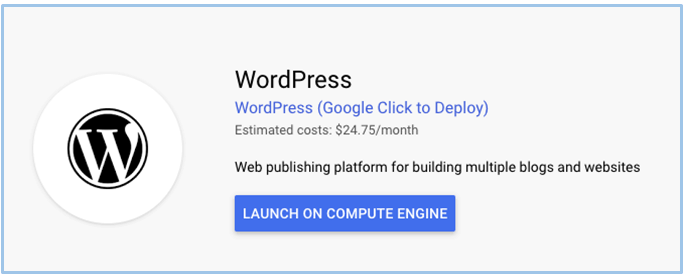
Step Two: Launch Compute Engine
On the next screen, select Launch on Compute Engine, then select which project to install it into. I opted for My First Project, which had already been created by default. You’ll have to wait a few minutes for the APIs to be configured (just a fancy way of telling you the installation is in progress).
Step Three: Enter App Information
You’ll then be prompted to enter some information about your app. This page might look a bit confusing, but you only really need to enter your email address and name, leaving everything else as is.
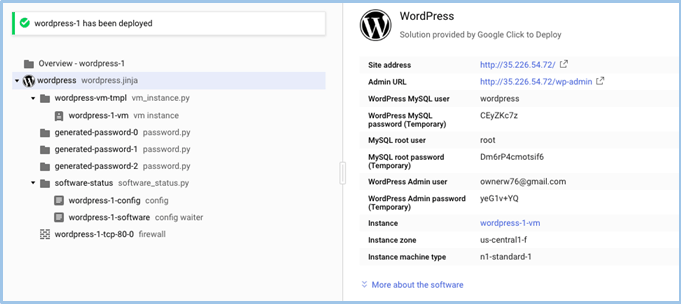
Step Four: Wait for the Installation
Again, you need to wait a minute or two for the website to be configured, and that’s it. Your brand new WordPress website is live, albeit on a temporary domain—we’ll get to that in a moment.
Step Five: Map Your Domain
Next, to map your domain to the WordPress instance, you’ll need to verify you own it via the console. To do this, follow these easy steps:
- Log into your Google console.
- Select VPC Network from the left-hand menu.
- From the dropdown under Type, make sure Static is selected.
- Go back to the hamburger menu on the left-hand side and select Virtual Machine.
- When you can see your WordPress instance listed, copy the external IP address to your clipboard.
- Head over to your domain registrar and create an A record pointing at the external IP. Hop onto your registrar’s live chat if you need help.
- Wait for your website to propagate. This could take anywhere between 5 minutes and 48 hours.
I did try to contact customer service throughout the process, since it wasn’t immediately clear how to connect the domain. Unfortunately, as I hadn’t paid for a support plan, it wasn’t possible.
Not Intuitive, but Relatively Quick
This process didn’t take very long, about 20 minutes in total, but it’s still not the simplest setup I’ve ever done. The language is quite technical and definitely tailored toward advanced users and developers.