
Are you looking to add reCAPTCHA to your WordPress comment form?
Spam comments have gotten out of control on WordPress websites. Instead of turning off the comments, you can add CAPTCHA to the comment form to practically eliminate spam.
In this tutorial, we’ll show you how to easily add reCAPTCHA to the comment form of your WordPress website.
What Is Google ReCAPTCHA?
Comment spam is a problem on many WordPress websites. Akismet, the popular spam filtering service for WordPress, blocks about 7.5 million spam comments every hour. ReCAPTCHA is one of the best ways to fight it.
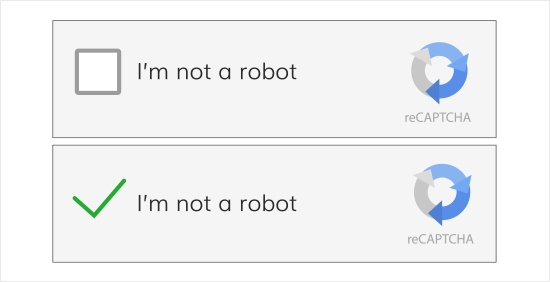
ReCAPTCHA is an advanced form of CAPTCHA that can distinguish between robots and human users. In fact, CAPTCHA is an acronym for ‘Completely Automated Public Turing Test to tell Computers and Humans Apart’.
Google acquired CAPTCHA technology in 2009 and then later rebranded it as reCAPTCHA. They also made it easier for human users to easily pass the test.
To pass the test, users are required to click a checkbox indicating they’re not a robot. They will either pass right away or be presented with a set of multiple images where they will need to click on matching objects.
Google has made reCAPTCHA publicly available, so that website owners can use it on contact forms, login pages, and comment forms to reduce spam.
It is super easy to set up and add to the WordPress comment form.
With that said, let’s see how to easily add reCAPTCHA to the WordPress comment form with step by step instructions.
Installing a WordPress reCAPTCHA Plugin
The first thing you need to do is install and activate the Simple Google reCAPTCHA plugin.
Upon activation, you’ll be automatically taken to Settings » Google reCAPTCHA to configure the plugin settings.
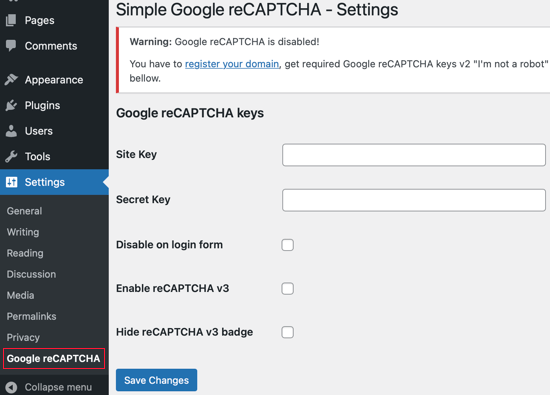
The plugin will ask you to provide Google reCAPTCHA API keys. You can create these keys for free from the official reCAPTCHA website by clicking the ‘register your domain’ link at the top of the screen.
Registering Your Website to Get reCAPTCHA API Keys
The ‘register your domain’ link will take you to the Google reCAPTCHA website where you can register your site to work with reCAPTCHA.
You’ll be asked to sign in with your Google account. After that, you’ll see the “Register a new site” page where you need to provide some basic information to register your site.
First, you need to type your website name or any name of your choice in the Label field. This will help you easily identify your site in the future.
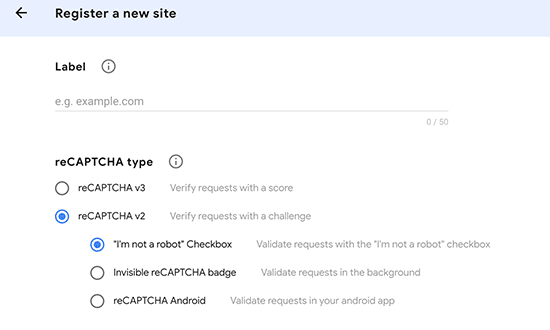
Next, you need to select the reCAPTCHA V2 radio button.
This will open up 3 new options. Since you want to add the reCAPTCHA checkbox to your site, you need to select “I’m not a robot” Checkbox.
The Domains textbox allows you to add the domain name of your website where you would like to add the reCAPTCHA checkbox.
You can also add multiple domains or subdomains by clicking on the plus (+) icon. This will allow you to use the same API keys on different websites.
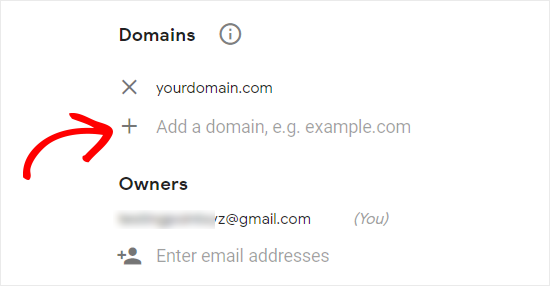
Under Owners, Google will already add your email address. You can also add another email if you want.
Next, you need to accept the terms of service to use Google reCAPTCHA on your site.
Also, select the ‘Send alerts to owners’ checkbox to allow Google to send emails to you if they detect any misconfiguration or suspicious activity.
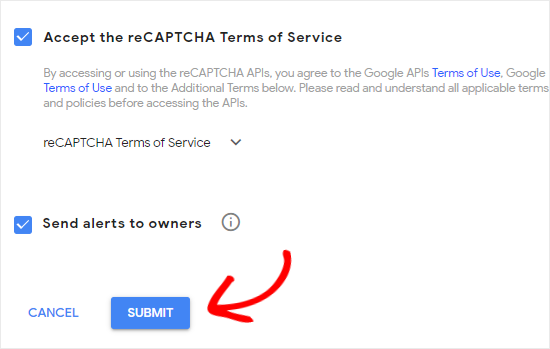
Once you’ve filled the form, you can click on the Submit button to register your site.
Google reCAPTCHA will now show you a success message along with the site key and the secret key on this page.
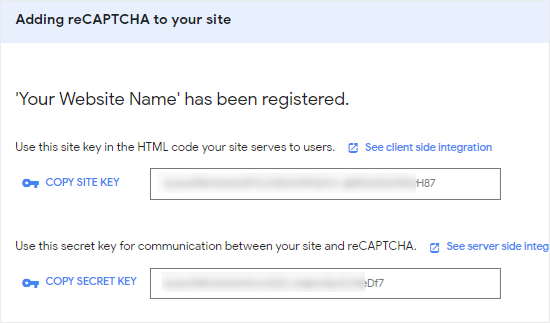
You can now use these API Keys in plugin settings on your website.
Adding reCAPTCHA to WordPress Comment Form
Head back to Settings » Google reCAPTCHA from the left sidebar of your website’s admin panel.
On the settings page, you need to paste the site key and the secret key.
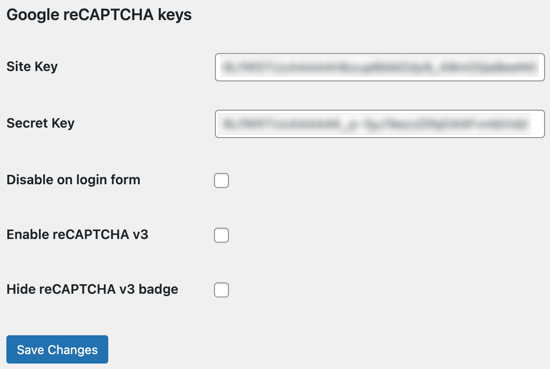
The plugin will add reCAPTCHA verification to the WordPress comment form as well as the registration form, reset password form, new password form, and login form.
If you like, you can check the disable reCAPTCHA on the login form by clicking the checkbox.
Once you’re done, click on the “Save Changes” button to store the API keys and enable reCAPTCHA.
Congratulations, you’ve successfully added reCAPTCHA to your WordPress comment form. You can now check the comment section of your blog posts to confirm that it’s working properly.
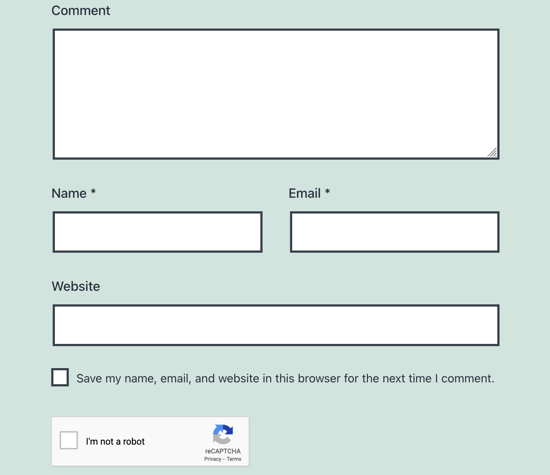
Note: The reCAPTCHA checkbox will be displayed only to logged-out users. To preview reCAPTCHA, you will need to either log out of WordPress or open your website in an Incognito window of your browser.
We hope this tutorial helped you learn how to add reCAPTCHA to the WordPress comment form of your website.