
WordPress powers over one-third of the world’s websites, and it’s a pretty safe bet that not all of those sites have English content.
There’s a reason why WordPress is so globally popular and used by webmasters around the world – it gives you several different ways to control both the front-end languages that your visitors will see, as well as the languages available in the backend WordPress dashboard.
Three Benefits of Making Your WordPress Website Multilingual
Before showing you how to change to multilingual WordPress, let’s quickly run over the three big benefits to doing so.
1. It Creates a Better User Experience for More People
Here’s a great example: Ron Dorff was able to expand their reach from a predominantly French audience to an international audience from the UK, USA, and Germany. In fact, after translating their products into three languages, a majority of Ron Dorff’s sales (70%) came from these international audiences.
2. It Increases Your Website’s Visibility in Google (International SEO)
Let’s say that you’re using Astra’s LearnDash Academy starter site to launch an online course about how to play guitar. You’d have people searching in English for “how to play guitar”. However, there’s also a significant number of people searching in other languages – for example, “como tocar la guitarra”, in Spanish.
By translating your website’s content, you give yourself a chance to rank in Google for both “how to play guitar” and “como tocar la guitarra”, which means you can work to expand your website’s search visibility without needing to create new content from scratch.
3. It Boosts Your Conversion Rate
Here’s another example: La Machine Cycle Club boosted its conversion rate by 25% (and its international sales by 50%) when they made the decision to translate their website into three different languages.
How to Get Started With Multilingual Website
To let your visitors change your WordPress site language, you’ll need a WordPress translation plugin.
There are a lot of great options out there, with some of the most popular tools being:
- Weglot
- WPML
- Polylang
- TranslatePress
While all of those are popular options, we will use the Weglot translation plugin in this tutorial as it’s cloud-based, easy-to-use and offers a free plan.
Here are some of the things that make Weglot unique:
- It starts off by using machine translation to translate 100% of your website, rather than having you manually translate your content right away. You can then go back and edit these translations if needed or outsource them to professional translation services.
- It scans your website’s front-end for text to translate, rather than looking for text in theme or plugin files. This lets Weglot offer comprehensive translations without requiring a built-in theme or plugin compatibility.
- Your translations are stored in the cloud and delivered from Weglot’s servers, which means there are no requests to your database just to load translated content.
Weglot lets you translate up to 2,000 words into one language for free. After that, paid plans start at €9.90 per month for up to 10,000 words and go up from there.
How to Change the WordPress Website Language in Frontend
To show you how to translate your website, we’ll use one of the free Astra starter templates. If you’re not familiar, these starter templates basically let you import a fully-built website. Then, you can tweak things to make them your own using Astra’s detailed Customizer controls and your WordPress page builder of choice.
Consequently, this tutorial is actually showing two things:
- How to translate the Astra theme.
- How to translate content from the Elementor website builder.
Here’s how things look in the default English language version of the Coach starter site:

1. Activate Plugin and Choose Languages
To get started, install and activate the free Weglot plugin from WordPress.org. Then, you’ll also need to register for a Weglot account to generate your Weglot API key.

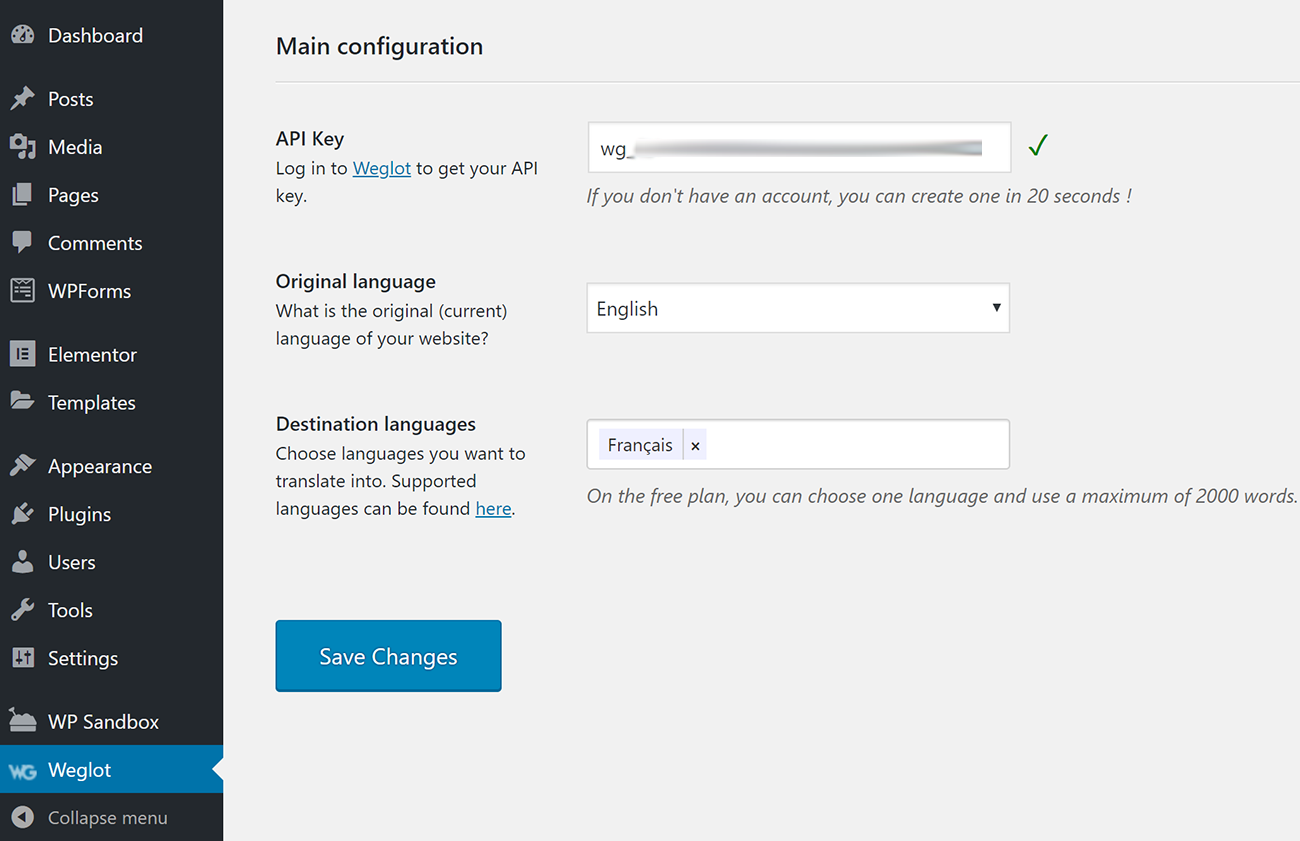
From there, go to the new Weglot settings page in your WordPress dashboard and:
- Enter the API key.
- Choose your Original language, which is the default language that your front-end content is currently written in. For example, if your website is in English, you’d select English.
- Choose your Destination languages, which are the different languages into which you want to translate your website’s content. You can choose from a range of different languages, including Spanish, German, French, etc.
For example, here’s how it looks to translate an English language website into French:
As soon as you click Save Changes, Weglot will automatically translate your website’s content with machine translation and add a front-end language switcher for your visitors to use:

2. Manually Refine Translations
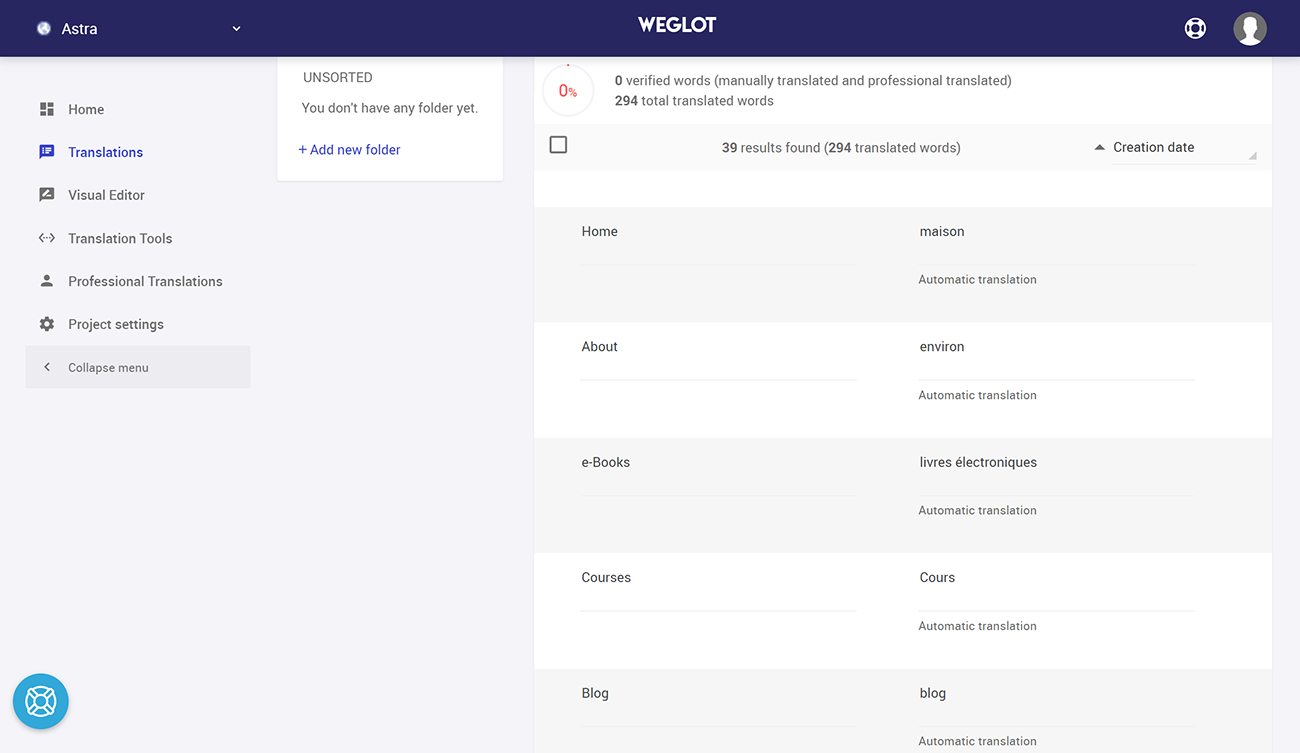
If you’d like to manually refine your website’s machine translations, you can use the Weglot cloud dashboard.
There, you’ll get two different ways to edit translations.
First, you can use the Translations list editor, which looks a lot like the traditional MO translation files or PO files. That is, you’ll get a side-by-side list with the original content on the left and the translated version on the right:
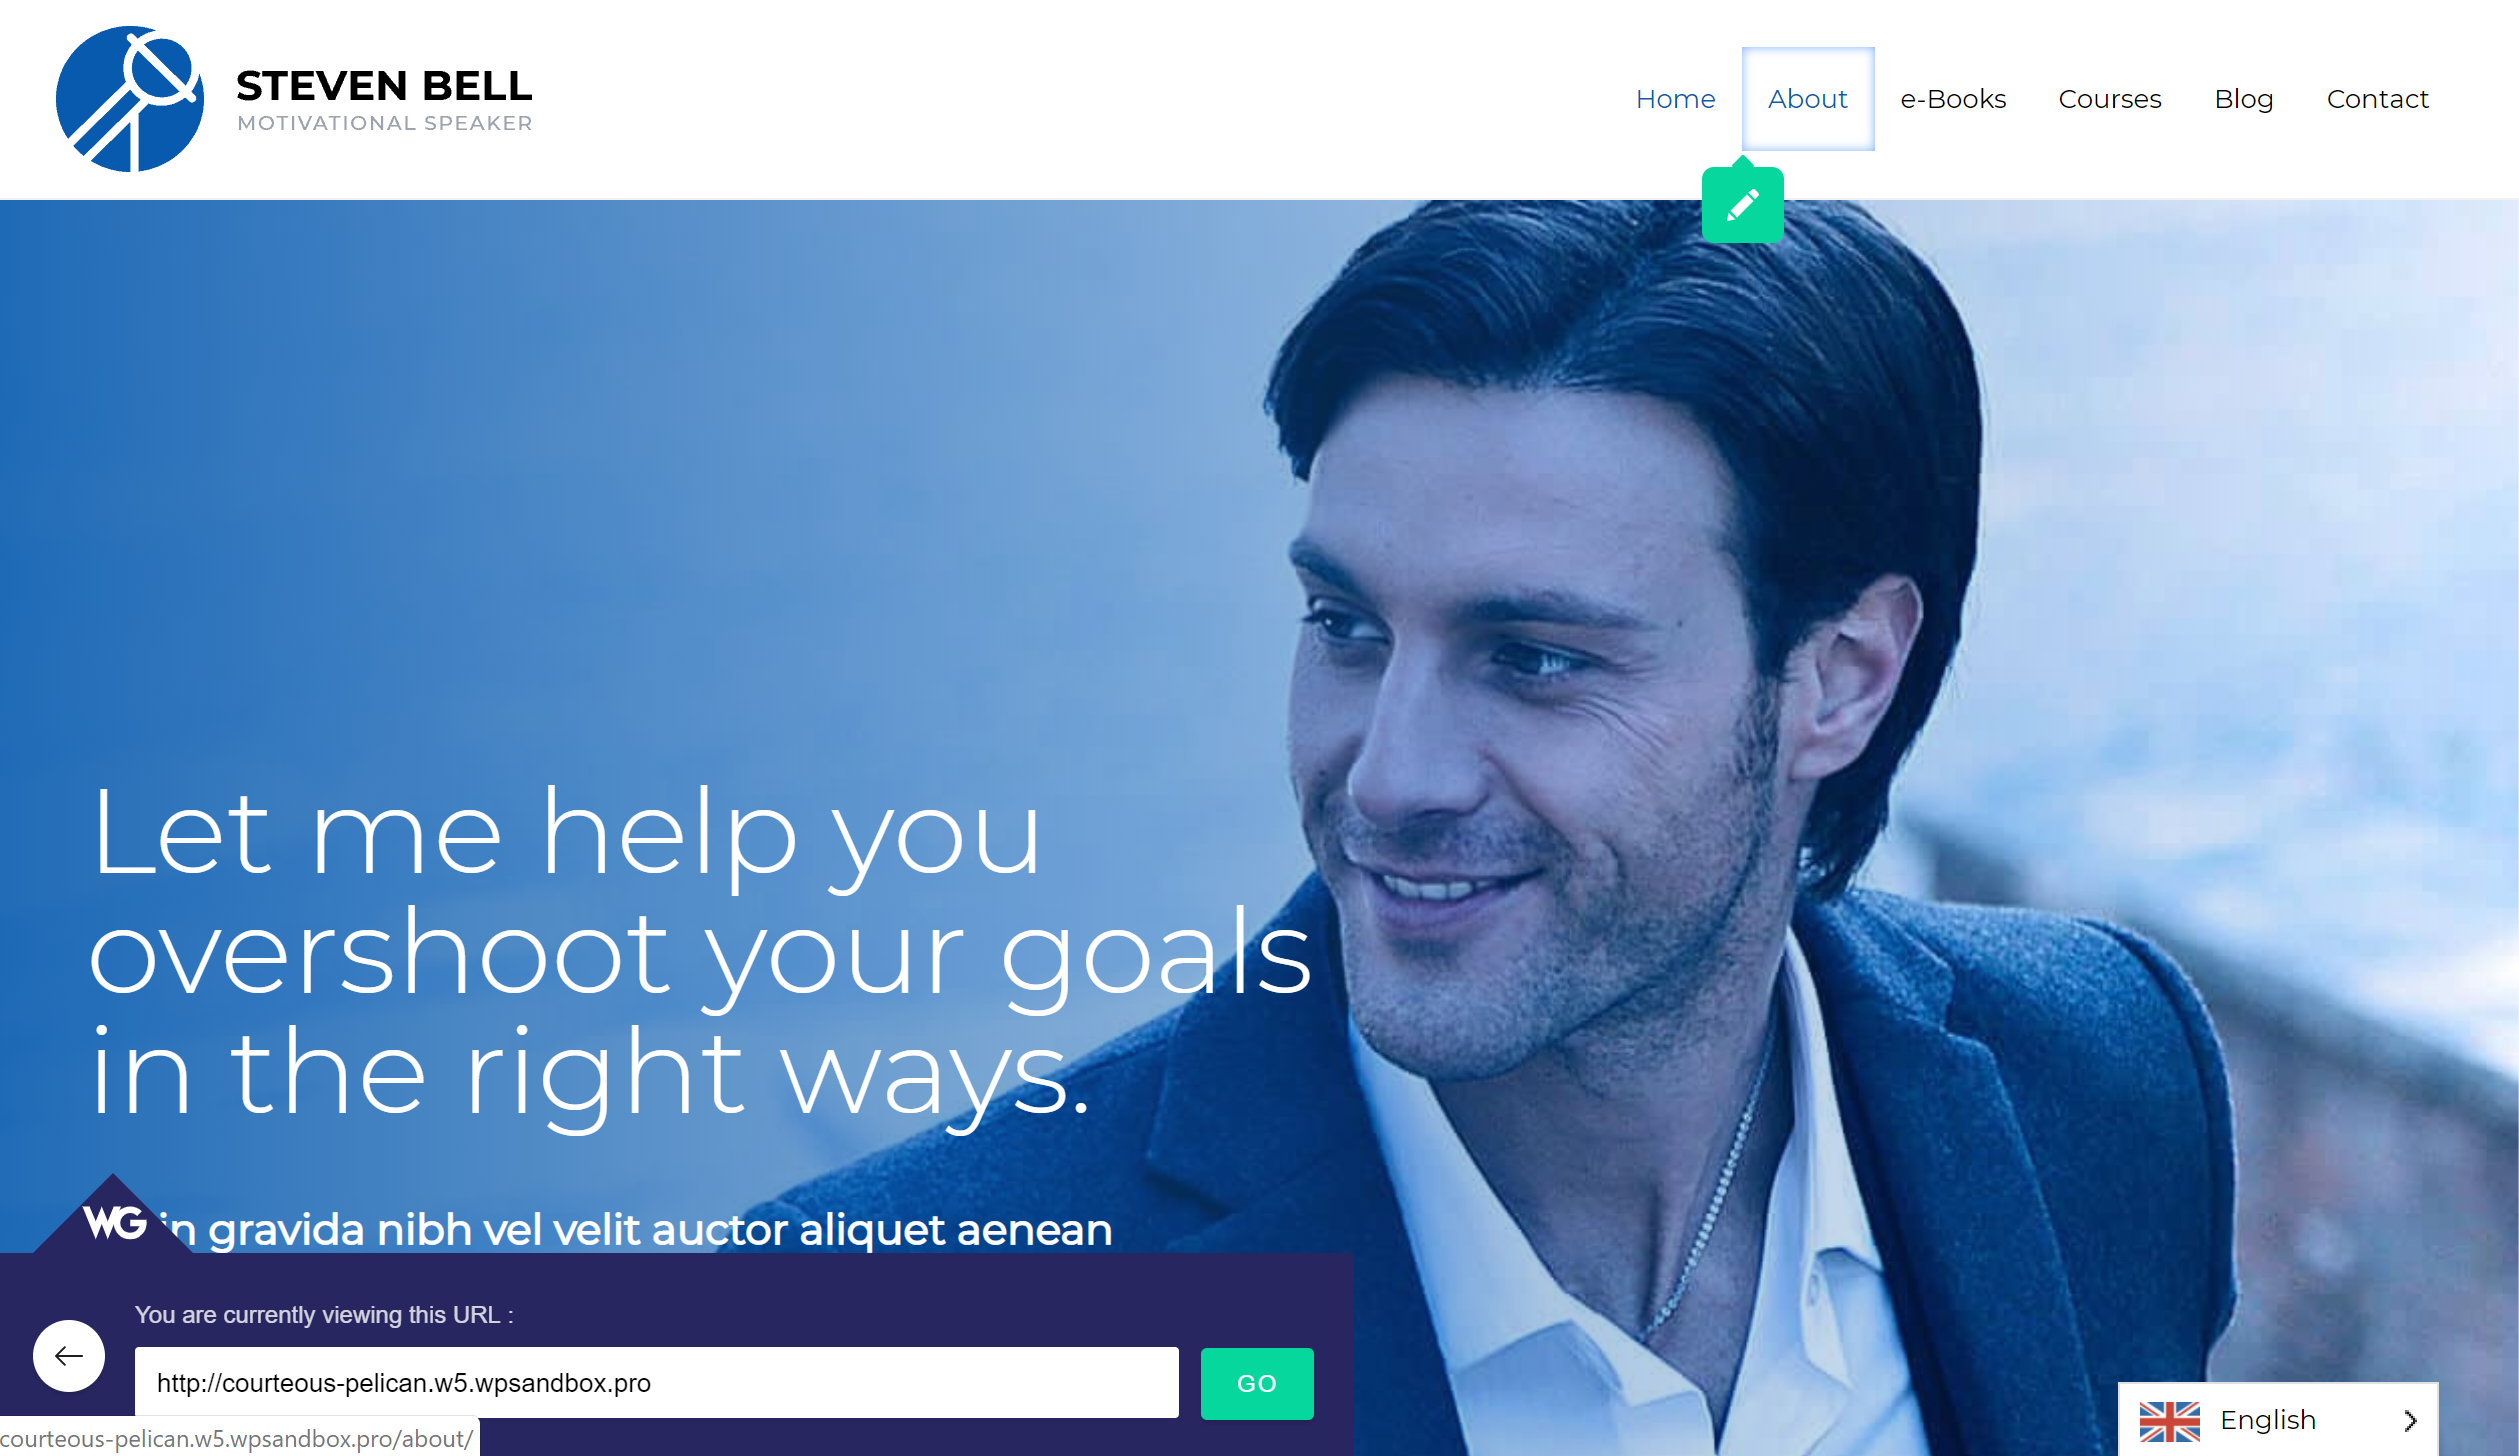
Or, you can also use the Visual Editor, which lets you edit translations by clicking on text on a live preview of your website. For example, to edit the Astra theme’s navigation menu, you’d just hover over it and click the green pencil icon:
How to Change the WordPress Website Language in Your Backend Dashboard
In addition to changing the WordPress multilingual website language for visitors on the front-end of your website, you can also change the WordPress multilingual language used in your backend WordPress admin dashboard.
This is helpful if you’d like to use a different language for yourself or allow registered users to choose different languages. For example, maybe one of your contributors speaks a different native language and you’d like to create a more user-friendly experience for them.
Since the release of WordPress 4.0, installing WordPress language packs can be done right from your dashboard, without the need to work with a MO file in your wp-content folder or any extra efforts.
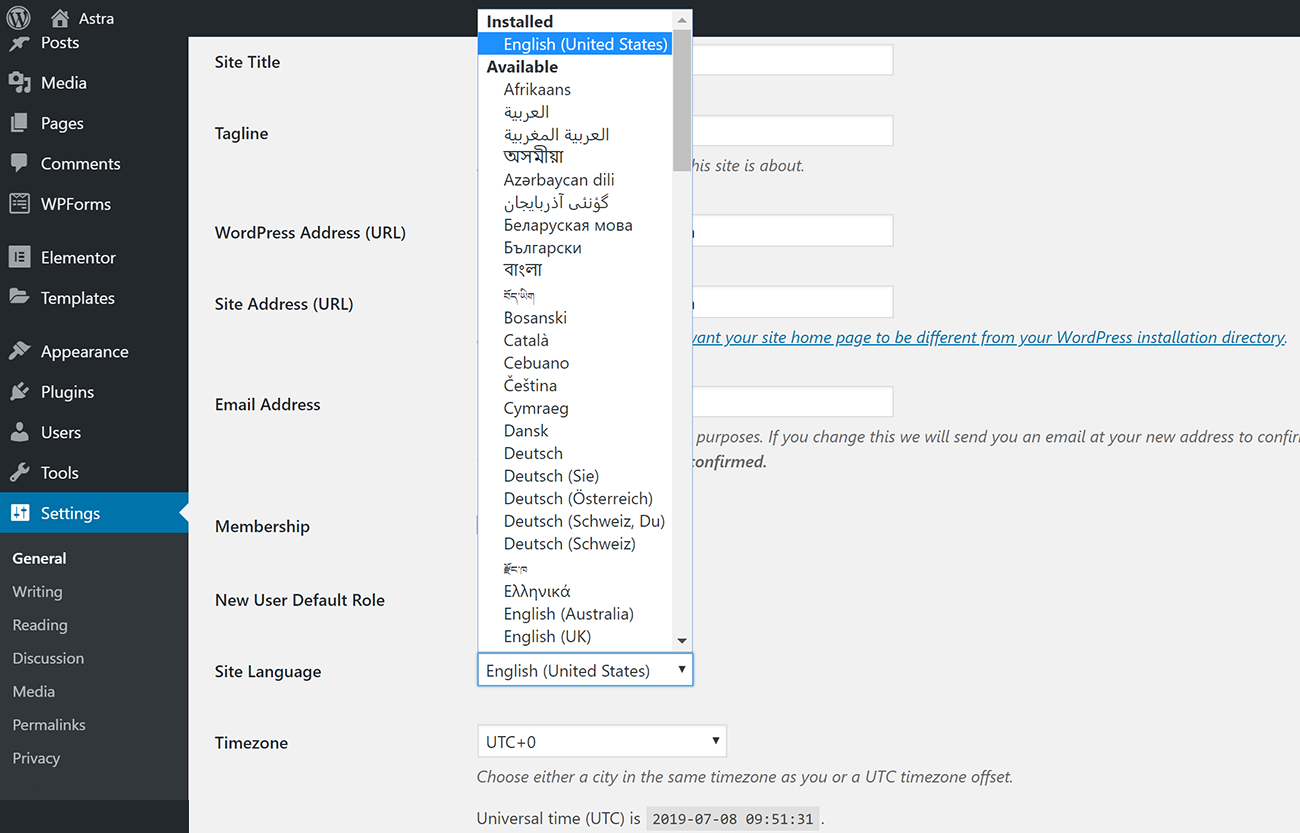
To get started, go to Settings → General in your WordPress dashboard. Then, look for the Site Language dropdown and choose your desired language:
Once you save your changes, WordPress will automatically download any necessary language files and activate the new language in your dashboard. This will also be the default language for other users at your website.
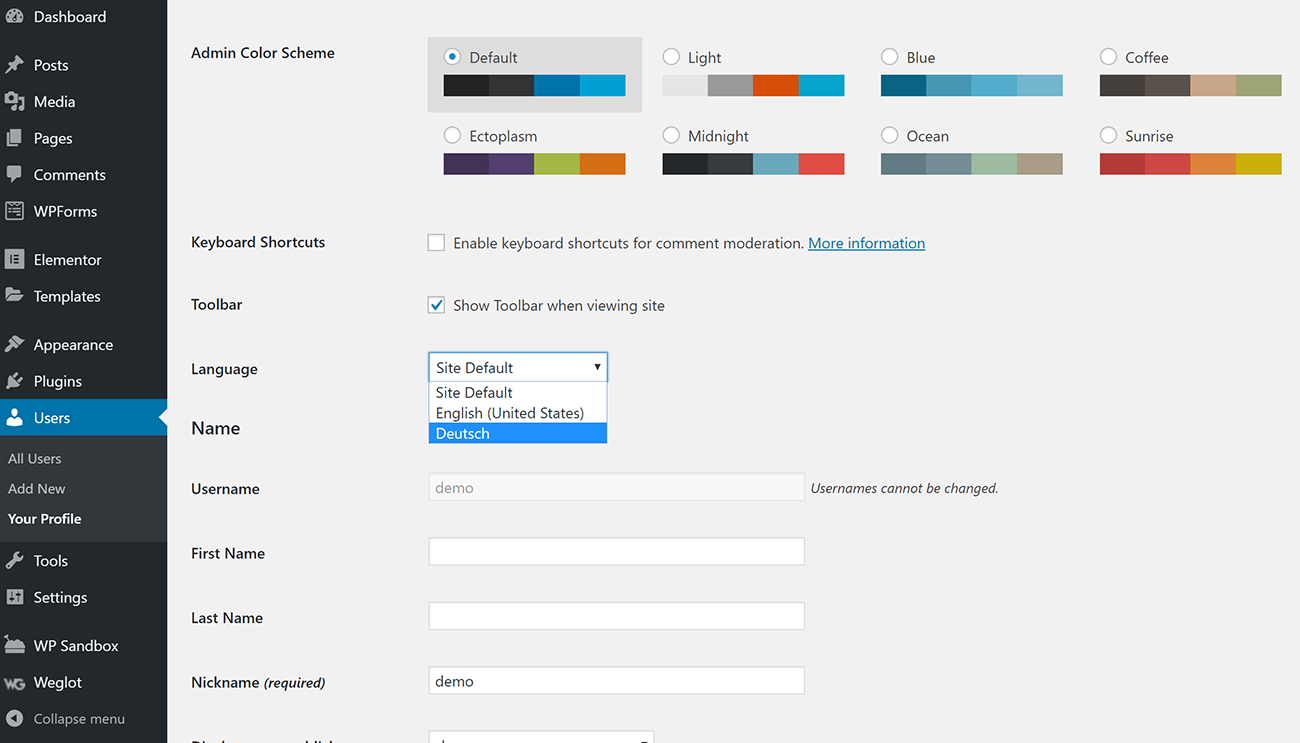
However, the great thing about how WordPress handles different languages is that individual users can still control their own WordPress language settings by going to their Your Profile page and using the Language dropdown.
They’ll see all of the available languages that you installed via the Settings → General area in your dashboard:
If you want to install another language to make your website multilingual, you can go back to Settings → General and repeat the process.
Get Started with Making Your Multilingual WordPress Website Today
Whether you want to change your WordPress website language in the backend dashboard or for your visitors on the front-end, WordPress makes the process about as painless as can be.
On both the backend and front-end, your multilingual WordPress visitors will appreciate being able to browse in their native languages. And if you translate your front-end content, you’ll also get the added benefit of being able to rank your website’s content in Google in new languages.
Implement these techniques and get started with your new WordPress multilingual website capabilities today!