
Are you running a Shopify store? Want more control over the look and feel of your store? Looking to migrate from Shopify to WooCommerce?
Starting an online store with Shopify is really simple, which makes it one of the most popular eCommerce platforms for new store owners. But as your store grows, Shopify has limitations. Limitations which can push businesses to look elsewhere.
That’s what we’re going to talk about in this article.
We’ll cover migrating from Shopify to WordPress and walk you through the entire process.
We’ll also cover setting up, transferring data and ensuring you don’t lose anything during the move.
It’s everything you need to know if you’re planning to move from Shopify to WooCommerce!
Migrating From Shopify to WooCommerce
Migrating your eCommerce platform, your products, customers, orders may all seem to be daunting at first. The good news is, it’s easier than you might think to migrate from Shopify to WooCommerce.
There’s no need for any technical knowledge. You’ve only got to connect the two platforms, and we’re good to go in no time!
Shopify is a ‘done for you’ solution. This means, you really needn’t worry about what goes into setting up an online store. But, with the ease in setting up a store, you lose out on the much-needed flexibility and customization when you expand.
To add additional features and functionalities to your store, you’d need to purchase apps that add up to the overall cost. There are only a few free themes available, with limited customization. For every purchase that happens in your store, you’ll need to pay an additional transaction fee, which is over and above the fees paid to your payment processor.
Are you facing a similar situation? Do you want to migrate from Shopify to an alternate and viable eCommerce platform? Migrating to WooCommerce is your solution!
Migrating your eCommerce platform, your products, customers, orders may all seem to be daunting and challenging. The good news is, it’s easier than you thought to migrate from Shopify to WooCommerce.
In fact, in this article, we’ll cover, step-by-step, some solutions that ensure a seamless migration process. There’s no need for any technical knowledge. You’ve only got to connect the two platforms, and we’re good to go in no time!
Shopify and WooCommerce
Shopify is a beginner-friendly, and easy to use eCommerce platform. Shopify’s ‘done for you’ solution helps you set up and run an online store in a jiffy! Not to mention, Shopify being a hosted solution you needn’t worry about hosting your store and managing periodic website updates. It’s all done and managed for you by Shopify.
But, once your business expands, you may feel the need to have more control over your store in many ways. From website customization to periodic backups of the entire store, adding and customizing the themes, adding features and add-ons, SEO, well, there’s a lot you’d like control over.
Shopify can also get expensive over a more extended period. The larger and more successful your store becomes, the more you end up paying. Then it makes sense to consider switching to WooCommerce.
WooCommerce is an eCommerce open-source plugin used in WordPress. It’s designed for all sizes of online merchants using WordPress. And one of the most significant advantages of using WooCommerce is creating a full-fledged eCommerce site for free. Your only investment is in terms of your domain and hosting.
We’re assuming you have an existing Shopify store. We’re also assuming you’ve set up a WooCommerce store.
Why Migrate From Shopify to WooCommerce?
Unlike Shopify, WooCommerce is an open-source platform that gives you full control over your online store. You can customize the store exactly the way you want without any limitations.
Here are a few significant reasons why you might want to migrate from Shopify to WooCommerce.
Flexibility and Customization
A significant advantage of using open-source platforms such as WooCommerce and WordPress is the enhanced flexibility and customization. WordPress is under the General Public License, which means that, unlike Shopify, anyone can customize the WordPress and WooCommerce source code the way they like.
You have complete ownership and control over your store. WooCommerce also offers you an extensive library of over 300 add-ons built explicitly for eCommerce.
You can also sell anything from physical products, services, digital downloads, memberships, subscriptions, and anything you like.
Control Over Pricing
At any stage during your online journey, we’re guessing you’d like to keep your overheads to a bare minimum. When using WordPress and WooCommerce, your only investment is your domain name and the hosting.
You can opt for premium WooCommerce extensions that would enhance your store features and functionality, but these extensions are not mandatory.
With Shopify, the basic plan starts from $29 per month, going all the way up to the Advanced Shopify plan at $299 per month. Well, you want more features, you have to pay more!
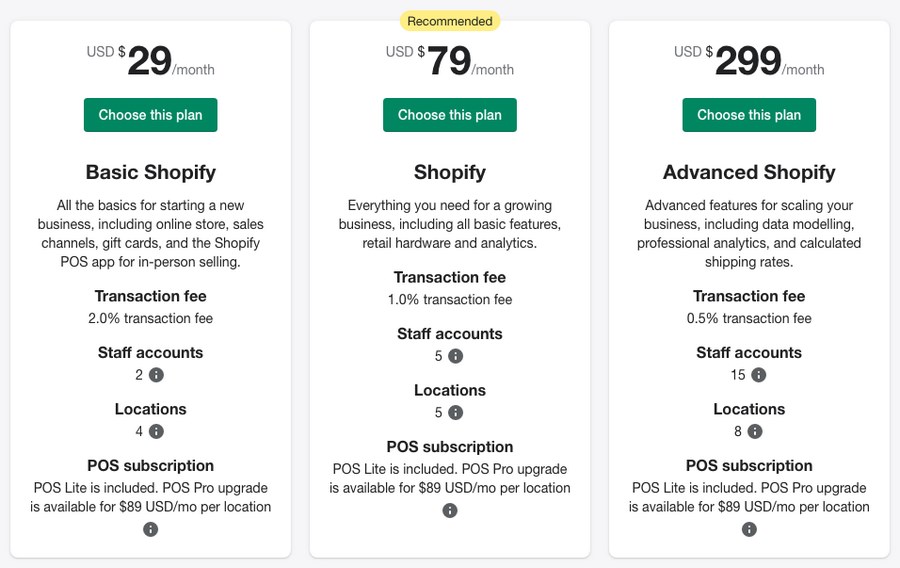
In addition to the monthly charges, you have an additional transaction fee when you’re using payment providers other than Shopify Payments. This is in addition to the fees charged by your payment providers.
With WooCommerce, you’re not charged any additional fees. You only pay the transaction fees charged by your payment provider.
Unlike the WooCommerce plugins that are predominantly free to use, many Shopify apps require a monthly fee. These apps can help you enhance the functionality of your store but you do have to pay for them!
While the options are limited in comparison to WooCommerce, you do have some reasonably decent apps. You could try them out free using their 7-day or 14-day free trial period.
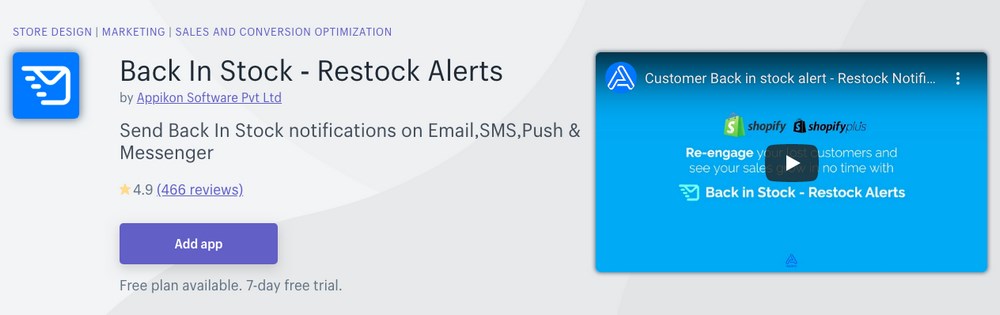
For example, if you’d want to send back in stock notifications via email, SMS, push, and Messenger, you could do so using their ‘Back In Stock – Restock Alerts’ app. You do have a 7-day free trial, post which you can start with the basic plan of $14.99 per month.
In addition to the costs mentioned above, to display real-time shipping rates on your Shopify store, you’ll have to opt for the Advanced plan. And this comes for $299 per month.
In contrast, WooCommerce allows you to display real-time shipping rates for only $79 a year. A considerable difference!
As we said early on, whether you’re starting out or are an established player, it’s essential to minimize your overheads and invest in areas that’ll help grow your business. WooCommerce helps with that.
Payment Gateway Integration
Both Shopify and WooCommerce offer payment integration with major service providers.
However, if you are catering to a local market, many lesser-known, niche service providers are not included in the list of payment providers. Neither do they have an app in the Shopify App Store. Using WordPress plugins, you can address the above concern in WooCommerce.
For instance, a popular payment gateway provider used by a lot of small and medium-sized businesses is Instamojo. While Shopify doesn’t provide this as a payment option and neither do they have an extension for it.
With WooCommerce, you can install the Instamojo plugin from within the WordPress ecosystem and integrate it with your store.
While alternatives could be considered to work around this, the biggest deterrent is the additional transaction fees charged on third-party payment gateways. This eats into your profit margins. The additional transaction fees can amount to thousands of dollars in lost revenue!
Search Engine Optimization
When it comes to Search Engine Optimization, WooCommerce offers much more control than Shopify.
SEO is the process of ranking your website on search engines for relevant keywords and is vital to the success of any online store.
With Shopify, you are limited to optimizing your content and your website.
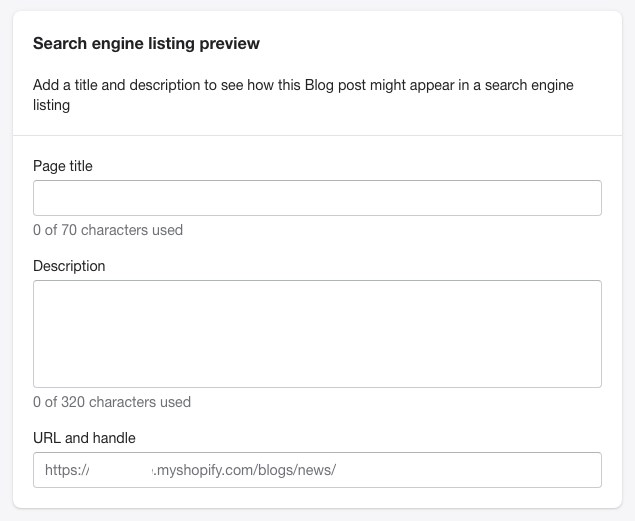
Each page in Shopify provides you the above-displayed options. That’s about it.
In contrast, WordPress offers some great SEO plugins such as Yoast SEO and Rank Math. Both offer a checklist of items to follow to fully optimize your content. Using these plugins, you have full control over what, when, how, and where you do your own SEO.
Unlimited Variations
Product variations are the additional options offered for each product. For example, if you’re selling t-shirts, you may have t-shirts of different colors, such as black, blue, red, white, yellow, etc. And offer t-shirts in different sizes, such as XS, S, M, L, XL, XXL, XXXL, and so on.
The combination of the colors mentioned above and sizes would create 35 different variants. Depending on the product, the variations can quickly add up.
Shopify limits the variations on each product to 100. In contrast, you can offer as many product variations as you need in WooCommerce.
Those are just some of the many reasons to migrate from Shopify to WooCommerce, we’re sure you can think of others. In the following section, we’ll cover step-by-step instructions on how to do it.
How to Migrate From Shopify to WooCommerce
If you already own a store on Shopify and want to migrate to WooCommerce, you may feel a little reluctant. After all, you wouldn’t want to lose your existing data, be it products, customers, or orders!
Don’t worry, if you follow the steps outlined in this guide, you won’t lose a single byte of data as we are copying it and not permanently moving it.
Manual Import/Export
While the process can be a little time consuming, migrating your store manually from Shopify to WooCommerce is relatively straightforward, and above all, it’s free.
Step 1: Export the CSV Files From Shopify
First, we will have to export our products, orders, and customer data from Shopify. Thus, we’ll need to export three separate CSV (Excel) files.
To export your products, head over to Products > All Products in your Shopify dashboard and click on Export.
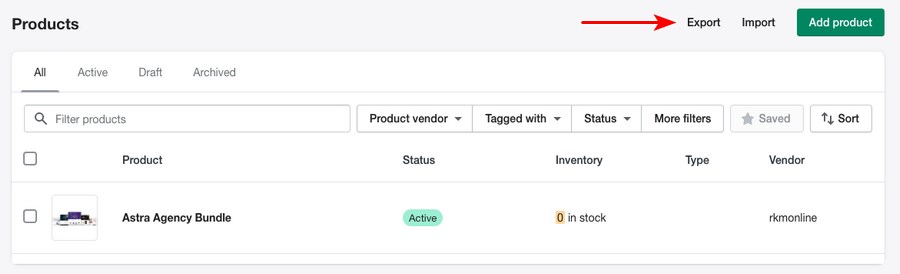
For the sake of this article, we added the product ‘Astra Agency Bundle.’
By applying the filter, you could choose to export either a single product, the products on the current page, or all the products in your store.
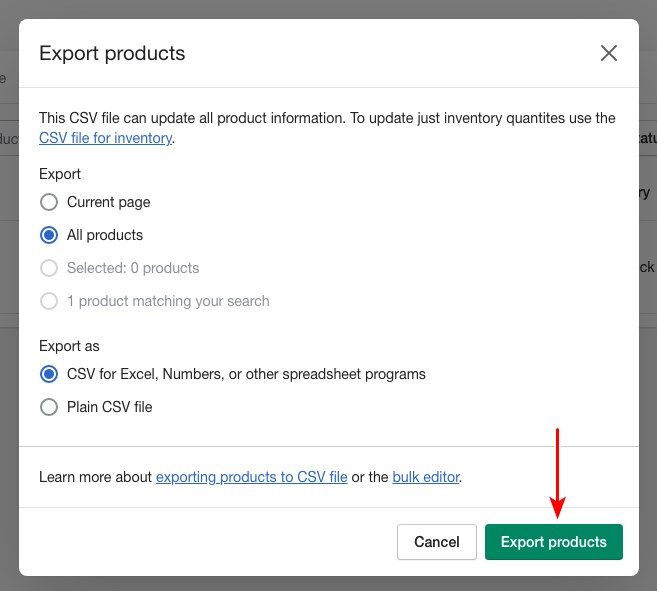
You could also choose the type of file you’d like to export as.
If you were to export up to a single page of products (i.e., up to 50 products), then a CSV file will be downloaded by your browser. Alternatively, if you exported more than 51 products, then the CSV file will be emailed to you.
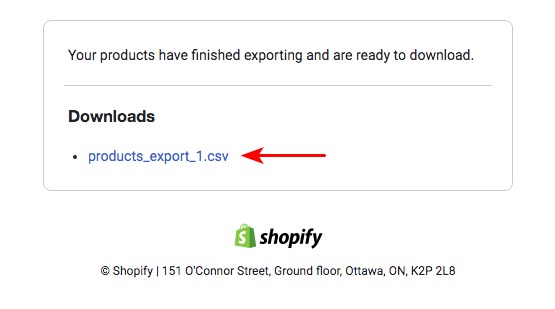
If you aren’t the store owner, then the file will be sent across to the store owner’s email as well. And, if you haven’t opted for a payment plan as yet, your CSV file will be downloaded to your browser. In our case, we’ve downloaded the file ‘products_export_1.csv’.
Similarly, head over to Orders and Customers and export the individual CSV files as well.
Step 2: Import CSV Files in WordPress
For every export, there’s an import as well! (ok, we made that up.)
Now that we’ve exported all the required files, we have to import them into our WooCommerce store. Let’s start with the products.
Head over to Products > All Products and click on Import.
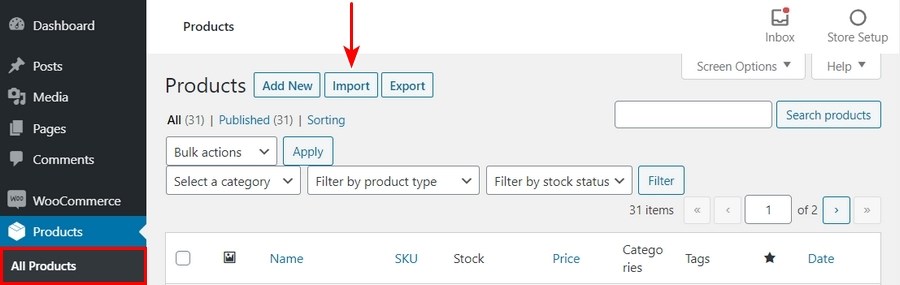
You’ll find a built-in product CSV importer that will make the entire process simple.
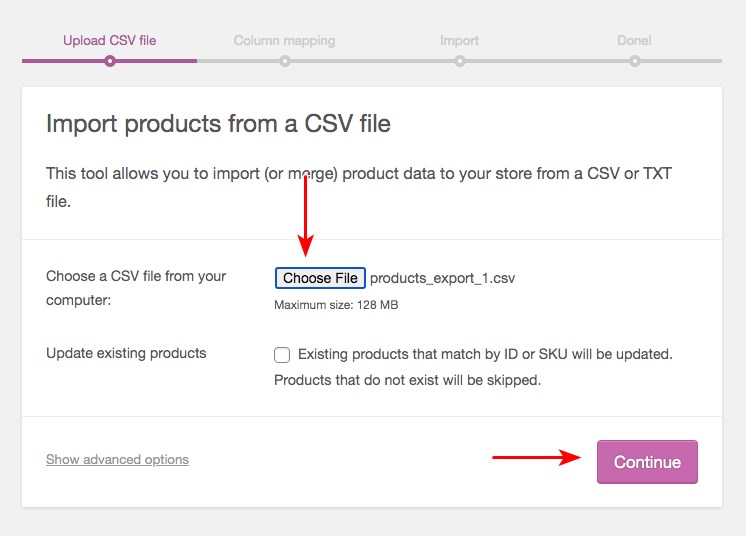
To begin the process, choose the CSV file you want to import. In our case, we’ve selected the ‘products_export_1’ CSV file and then click Continue.
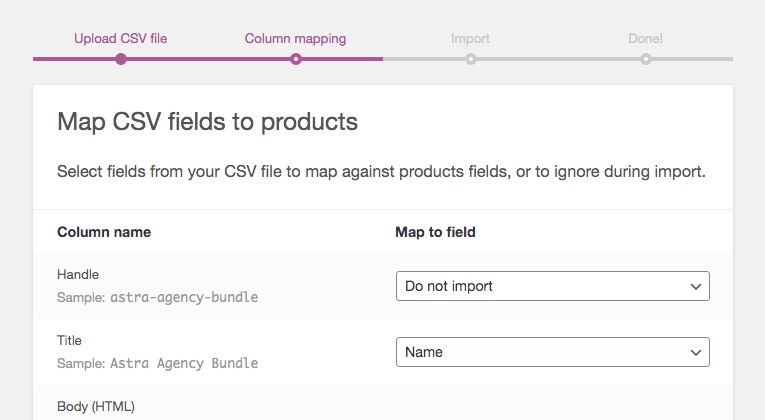
The next step is to map our columns.
WooCommerce will automatically match the column names of your CSV file to the WooCommerce product fields. You may have to map the field on your own by using the dropdown menus against each column header in some cases.
Once you’ve carefully mapped out each field, click on Continue.
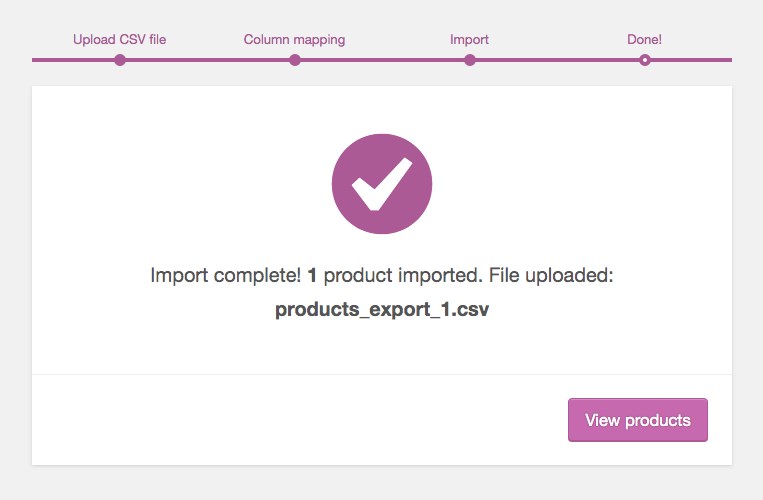
You should hopefully see a screen showing the successful completion of the import process.
To import orders and customers, you will have to install and activate a couple of free plugins. The first is Order Export and Order Import for WooCommerce, and the second is the Import-Export WordPress Users and WooCommerce Customers plugin.
Once you’ve activated the above plugins, follow the same process as we did for products to import the orders and customer CSV files.
Migrate Shopify to WooCommerce Using Cart2Cart
The Cart2Cart site migration extension helps you migrate from Shopify to WooCommerce in just three easy steps. While this is a premium extension, you can test the process with a free demo migration.
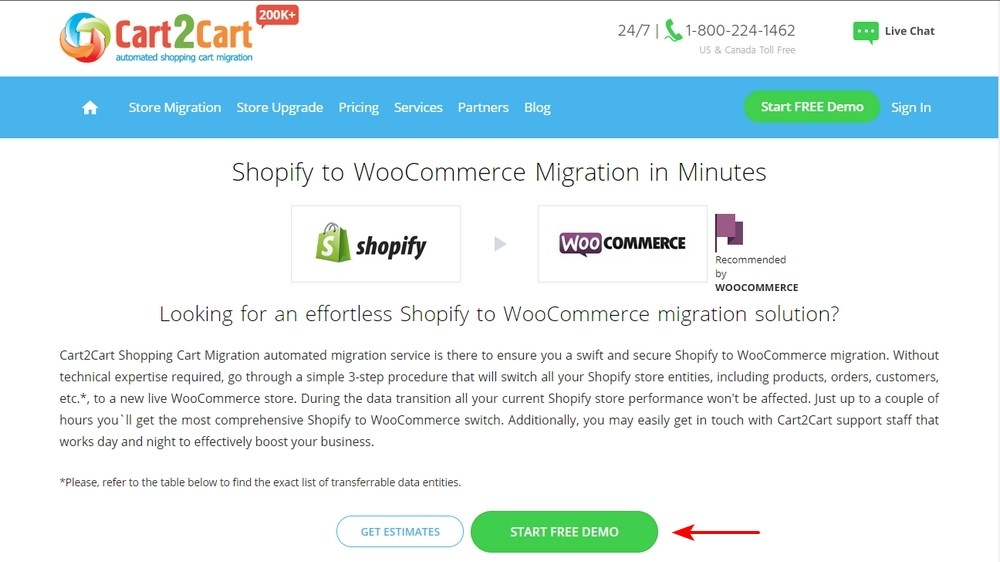
Visit the Cart2Cart Shopify to WooCommerce page and click on Start FREE Demo.
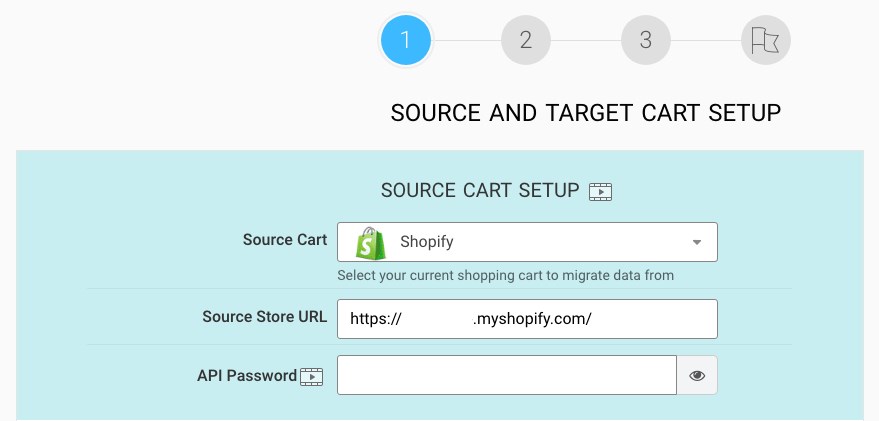
After you’ve signed in, you’ll be directed to step 1 of the 3 step process.
To begin, connect your Source Cart, which in this case is Shopify. Provide your current Shopify URL and the API Password.
Now, to get your API Password from Shopify, follow these steps. Head over to the Shopify dashboard and click on Apps from the left-hand menu links.
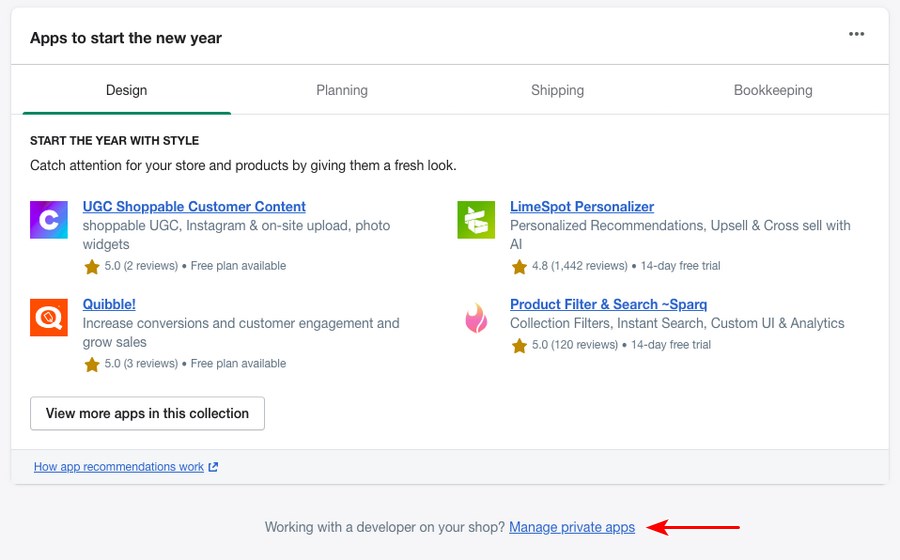
Scroll below and click on Manage private apps.
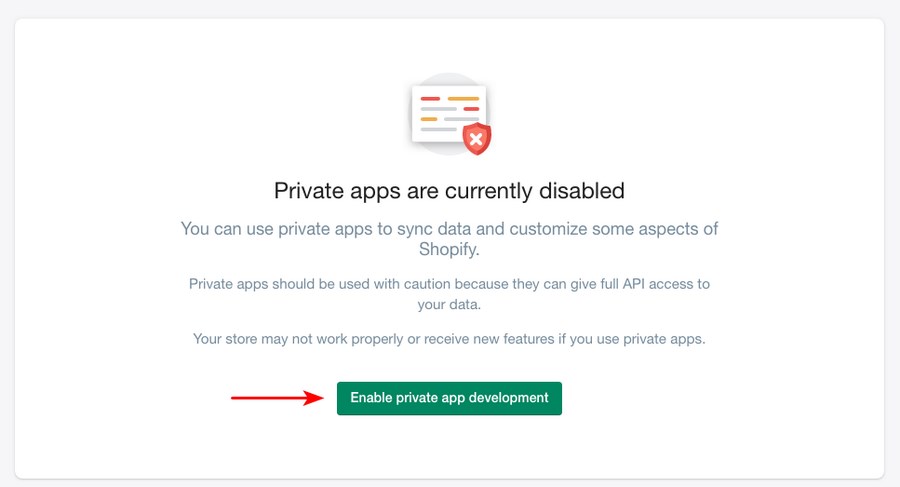
Next, click on the Enable private app development button.
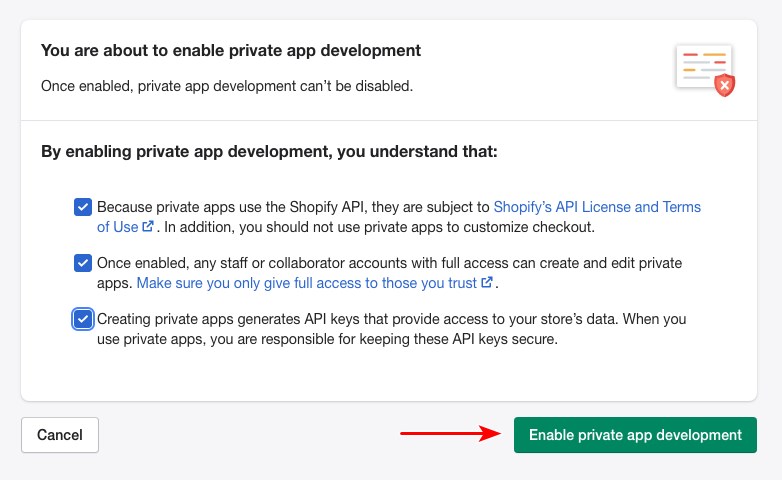
Select all the options, as shown above, and click on Enable private app development.
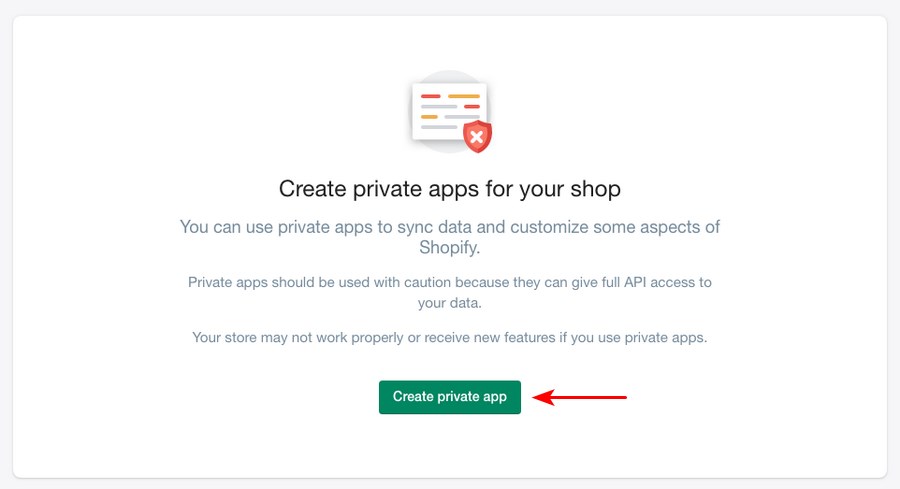
Now, click on Create private app.
Next, under App details, enter a name of your choice for the Private app name and an Emergency Developer email address.
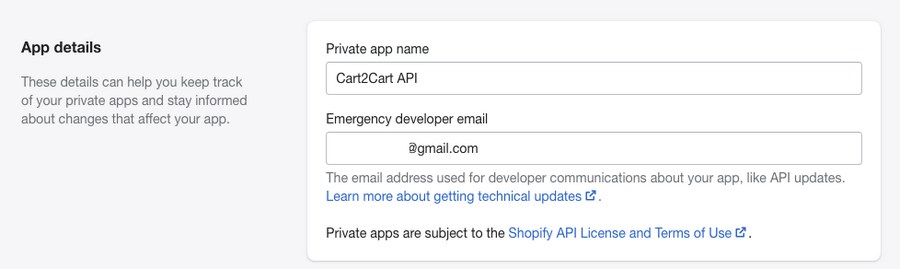
For instance, we’ve entered Cart2Cart API as the app name.
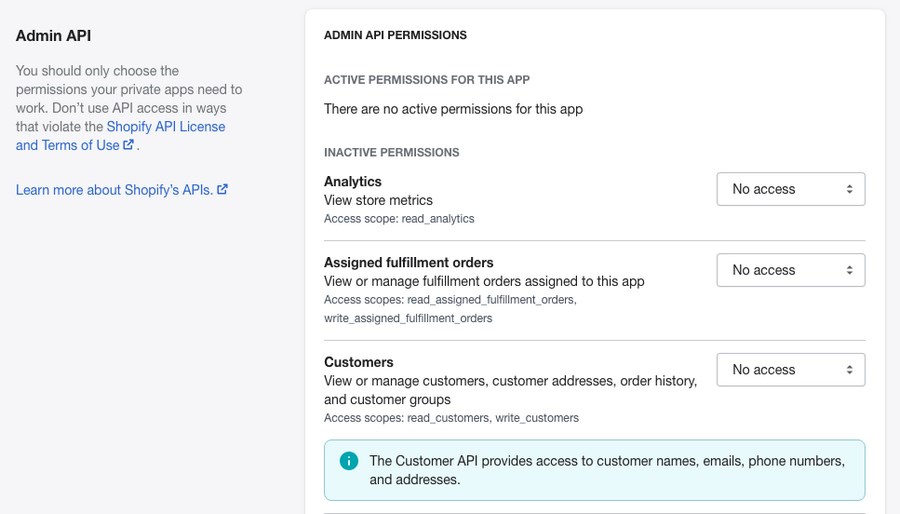
Next, change all the available entities’ permission status under Admin API Permissions to Read and Write. In some cases, there will only be Read access. Select accordingly and complete the setting permissions for all the entries included.
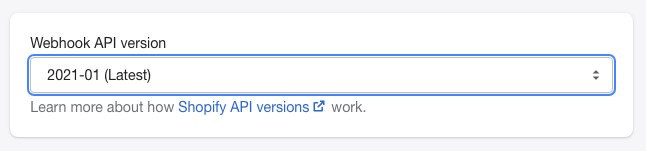
Once you’re done, select the Webhook API version to the latest version and click Save.
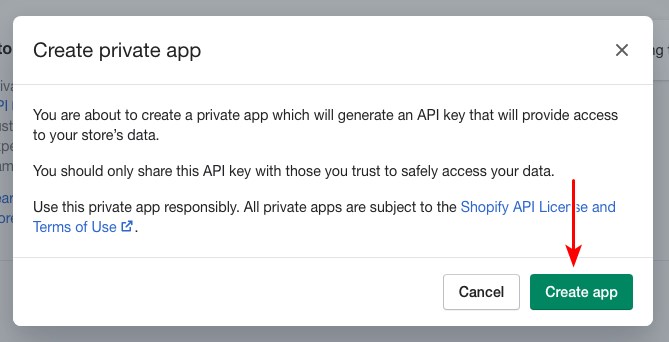
When prompted, click on Create app.
Now, head back to the Admin API area, and click on Show in the password field.

Copy this API password and head back to your Cart2Cart migration wizard and enter it into the relevant field under the Source Cart Setup.
The next step is to connect the target cart, which in our case is WooCommerce.
Set the Target Cart to WooCommerce and enter your WordPress Admin URL, Admin Login, and Admin Password details, as requested under Target Cart Setup.
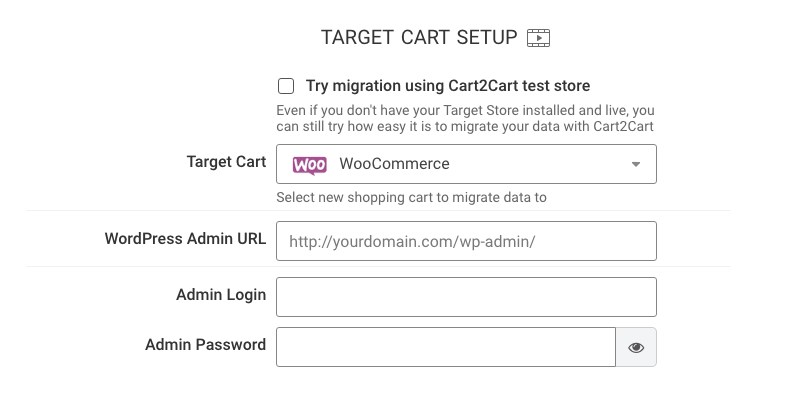
Once you’ve completed this step, click on Proceed.
At this stage, Cart2Cart is trying to connect both the platforms.
If you are on the Shopify trial period and haven’t selected a payment plan, the connection will not go through. We are assuming if you are migrating your store, you already have a live store on Shopify. So, the connection should go through without a problem.
In some cases, the automatic connection may face difficulties connecting with your WordPress back end. We did face some connection issues too.
In such cases, you’ll be prompted to set up a connection bridge manually.
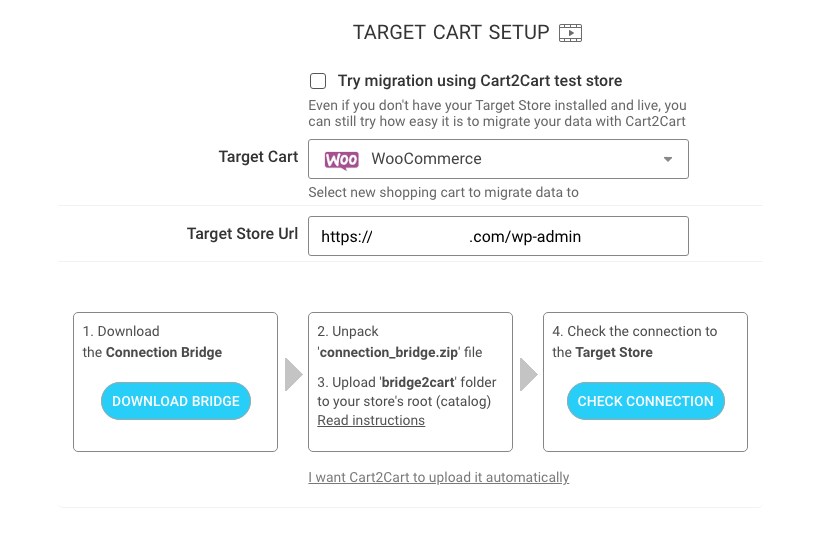
Click on Download Bridge. A file ‘connection_bridge.zip’ will be downloaded by your browser. Now, the following steps may be a bit daunting for a few but don’t worry about it too much, we got your back.
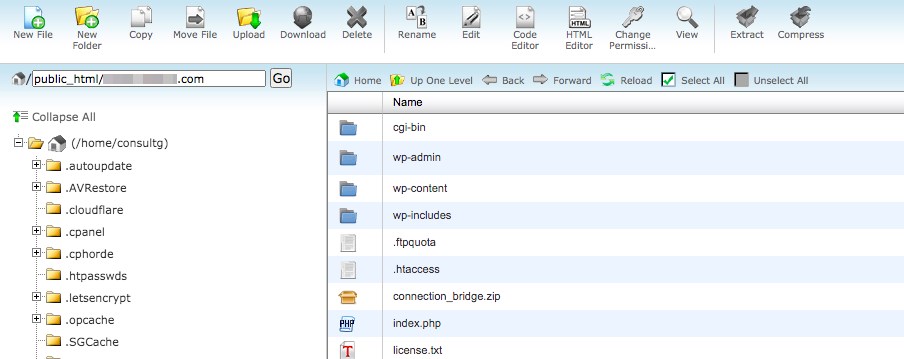
You are required to upload the .zip file to the root folder of your WordPress website. For this, you can either use FileZilla or connect from your hosting control panel.
FileZilla is a free, open-source application that enables you to connect to your website file manager. You will require the credentials and the hosting type to log in. These details will be available in your hosting provider’s dashboard.
Alternatively, you could log into your hosting account, and under the website control panel, select file manager. Then, upload the .zip file to your website root folder, as shown in the image below.
Once the file is uploaded, you have the option to extract the folder. You will notice ‘bridge2cart’ created in your root folder.
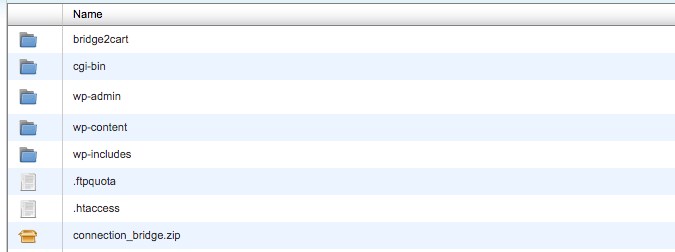
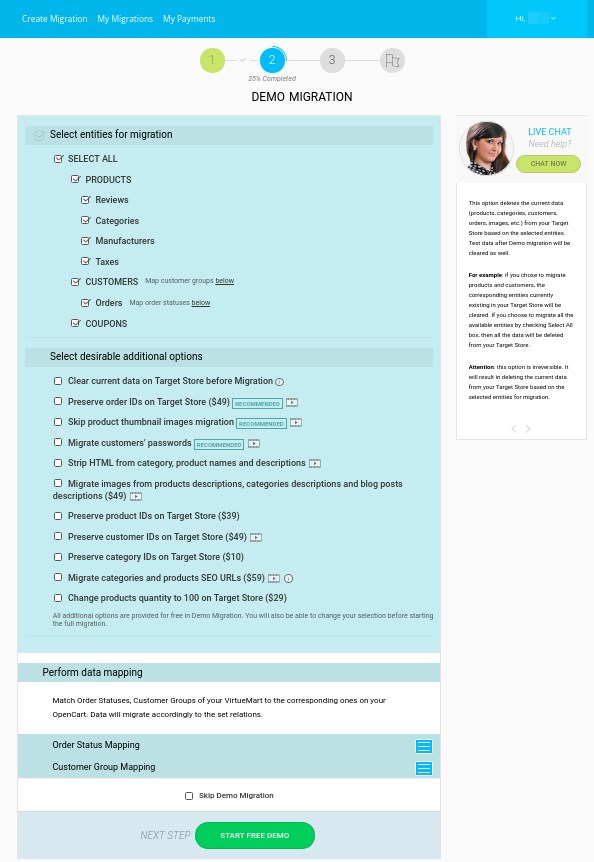
Now that you’ve manually set up the bridge connection click on Proceed. This will lead you to Step 2, where you will choose the data you want to migrate.
Choose the data you wish to migrate and match them to the corresponding WooCommerce fields.
What data can be imported to WooCommerce using Cart2Cart?
You can import products, customers, images, tags, product variants, categories, orders, coupons, reviews, manufacturers, multiple languages, multistore, taxes, passwords, and other data types.
Once you’re done, launch your migration. Depending on your website’s size and the number of products, orders, and customers, the migration length may vary.
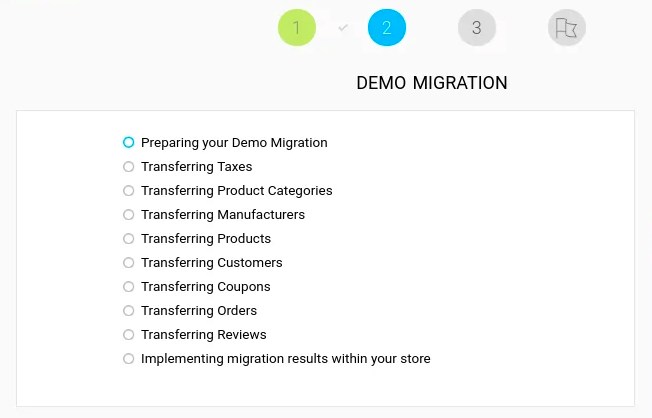
You’ll be prompted a success message on the completion of your site migration.
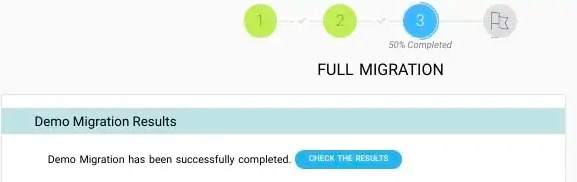
And that’s how you migrate Shopify to WooCommerce using Cart2Cart!
During this entire migration process, your Shopify store is still running in the background.
Cart2Cart Migration is free to set up and offers two options. The Demo Migration is free. And the Full Migration, which is a paid option.
The demo migration has a limit of 10 entities (i.e., ten products, customers, and orders) that you can migrate.
In contrast, the full migration allows you to migrate all your products, orders, customers, categories, and other related data to WooCommerce. The migration price starts from $29 and varies depending on the data volume to transfer and the additional options you select.
Conclusion
Shopify is a great beginner-friendly eCommerce platform. It gives you all the features to start selling online. And if you are someone who’d like a ‘done for you’ solution in creating an online store, well, Shopify is your perfect fit.
But as your online business grows, you’d like to have more control, flexibility, and customization in your store. And not to mention, if you are looking at an option wherein you can minimize your costs and overheads, WooCommerce is a more practical solution. After all, WooCommerce is a part of a strong WordPress community and comes with many perks!