
Here you will learn how to set a custom domain name to a website running at a localhost. In this way, instead of running and debugging the website using the localhost url (such as http://localhost:), it can be run using a dummy domain name e.g., www.mywebsite.com.
Setting up a custom domain name instead of a localhost will help you when testing of many things, such as redirecting a non-www to a www website or vice-versa, or redirecting from http to https before publishing a website to the production/hosting environment.
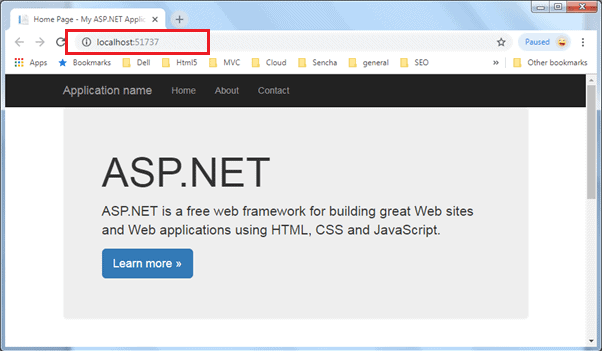
We have already created an ASP.NET MVC application in Visual Studio 2017 which runs with the url http://localhost:51737 (you may have a different port number), as shown below.
Now, we want to use our dummy domain name http://www.mywebsite.com instead of http://localhost:51737.
We will take the following steps:
- Publish the website in the local folder
- Create a new website in the local IIS
- Change the hosts file
Publish a Website in the Local Folder
Right click on the project name in the solution explorer of Visual Studio (2015/2017) and click Publish to publish your website to the local file system.
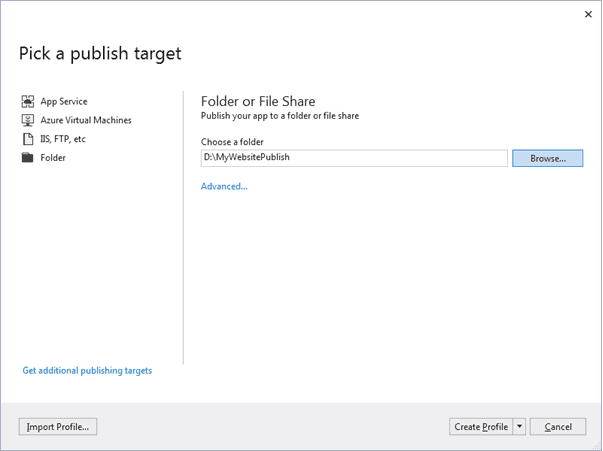
You may need to create a new publishing profile for the file system publish target by clicking on the New Profile.. link. Select an appropriate folder and click the Create Profile button, as shown below.
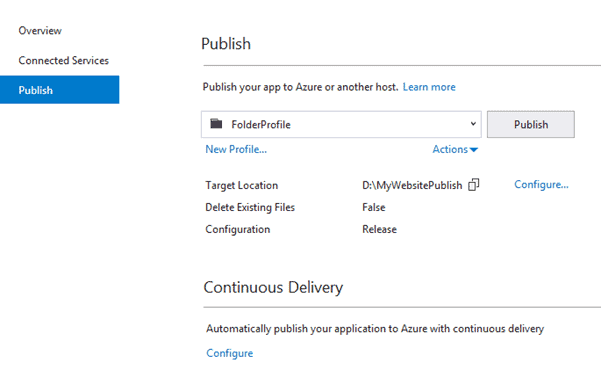
This will add a FolderProfile as shown below. Now, click on the Publish button to publish your website to the selected folder.
After successfully publishing a website, open the local IIS manager (enter inetmgr in the Run window).
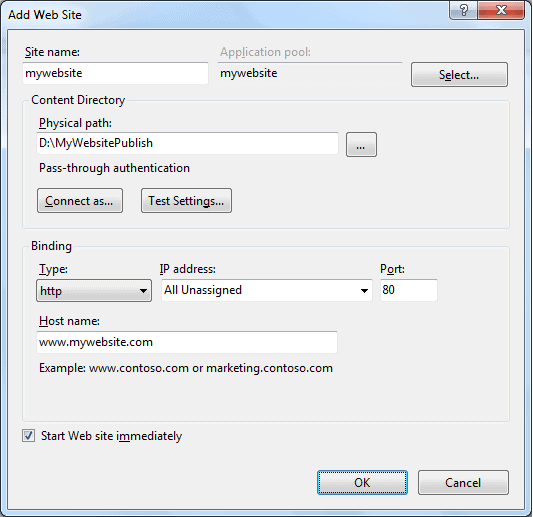
In the IIS manager, right click on Sites, click Add Web Site.. and enter the site name, physical path and hostname as www.mywebsite.com, as shown below.
This will create a website on the local IIS server.
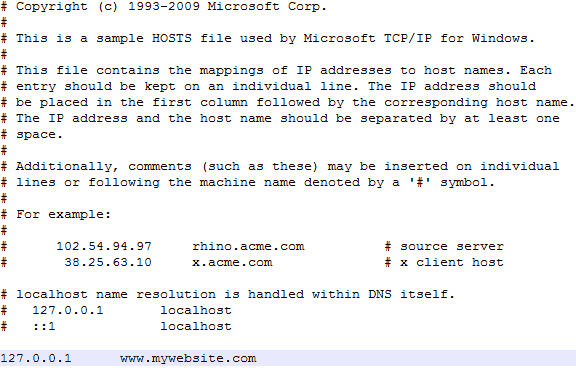
Now, we want to use http://www.mywebsite.com instead of the localhost url. For this, we have to open the hosts file located in the C:\Windows\System32\drivers\etc\ in Windows Vista, 7 and 8. The hosts file for Unix, Linux, and Mac OS X is located in /etc/hosts. Open hosts file as an administrator.
Add “127.0.0.1 www.mywebsite.com” at the end of the file, as shown below. This will tell IIS to search for the local website when www.mywebsite.com url is entered.
Now, we can enter www.mywebsite.com in the browser which will display our local website as shown below.

Debug localhost Website with Custom Domain in Visual Studio
Now, let’s see, how to debug a localhost website with the custom domain?
To debug your ASP.NET application in Visual Studio, we must publish it in the debug mode. For this, change your publishing profile and set the debug configuration, as shown below.

After publishing the website in debug mode, access your website e.g., www.mywebsite.com or https://www.mywebsite.com.
Now, to debug in Visual Studio, go to Debug -> Attach to Process.. menu. Select the w3wp.exe process from the popup, as shown below (if not listed, then check the ‘Select processes from all users’ checkbox).
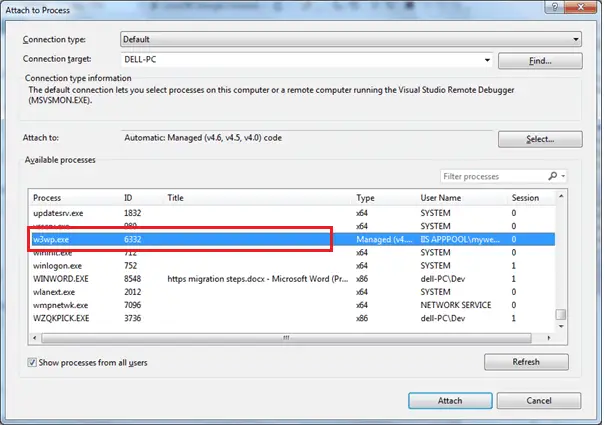
Click on the Attach button to attach the process.
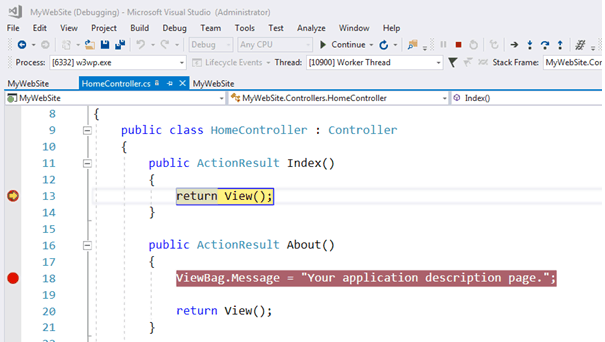
Now, you will be able to put a break point and start debugging, as shown below.
This is how you can set custom domain name for the localhost website and also debug it.