
Having your own custom domain name is one of the main things I always recommend a blogger do for various reasons:
- You own it which means you can move it anywhere with you. If you decide to move off of Blogger or decide that maybe one day you’d like to change your brand/blog to something a little different, you can do that easily.
- It looks much more professional and shows that you take your blog seriously.
- It’s easier for others to remember.
- You can set up your own email addresses using the domain name to stay consistent.
Before you do this, you will need to register a domain name. You can use any registrar you like.
Okay, now that you’ve got your domain registered, it’s time to put it to use. I’ve outlined this the best I can so follow along with me…
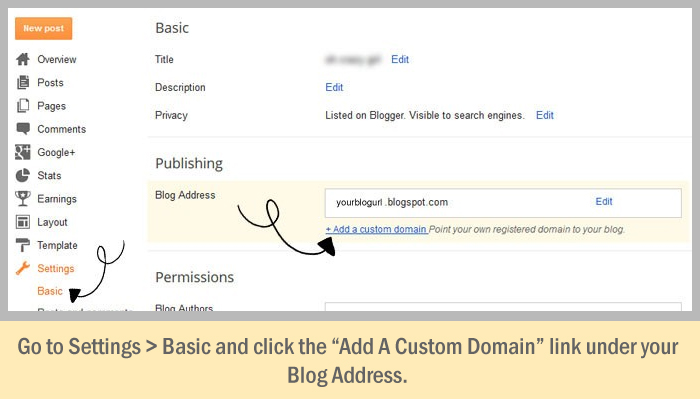
STEP 1:
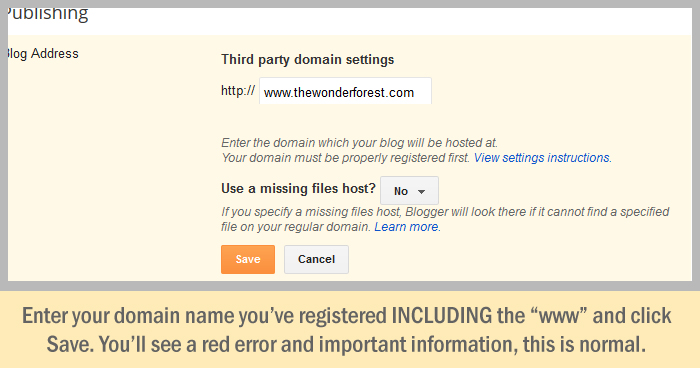
STEP 2:

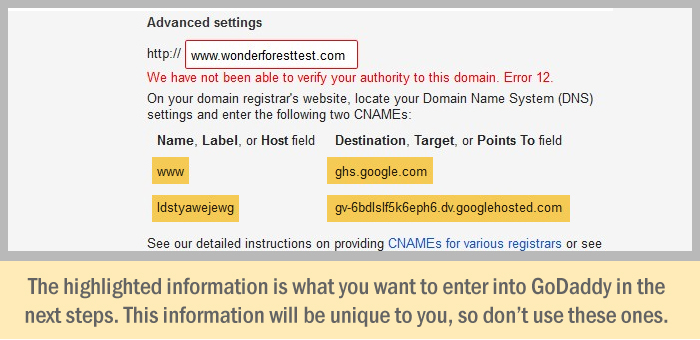
If you see the CNAME error and details as shown above, perfect, skip to step 3!
NOTE: If you’ve previously tried this and the CNAME information does not appear as above, try this:
- Click on “verification details” to the right of your custom URL
- At the top of the page click on the DNS CNAME Details to expand the record:
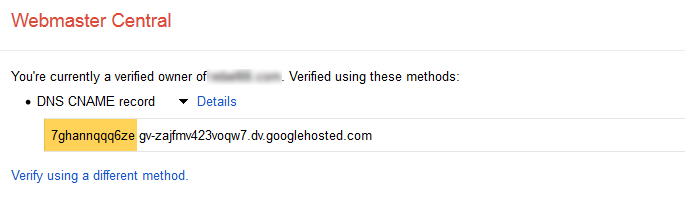
The portion in yellow above is your “Host” and the portion that begins with “gv-” is your “Points To” for the step below.
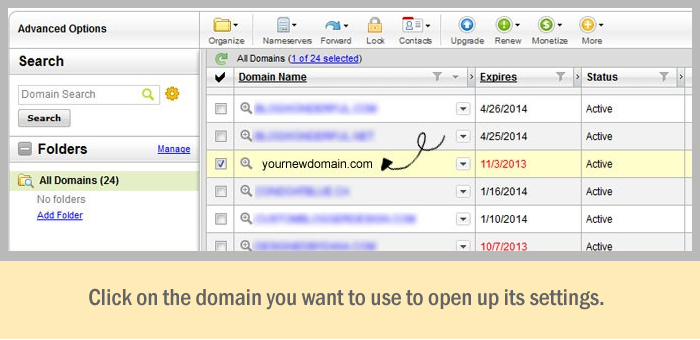
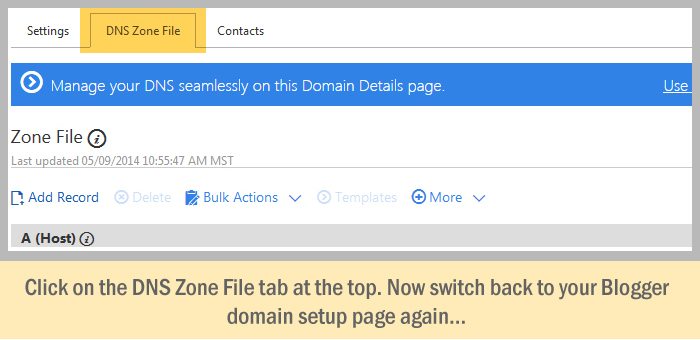
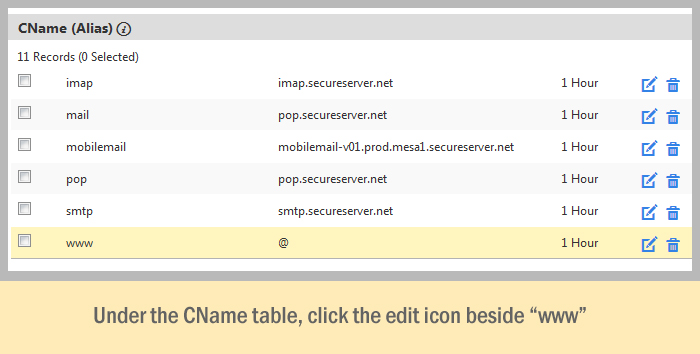
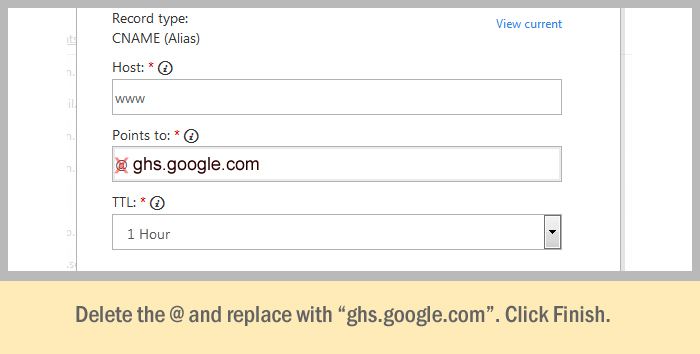
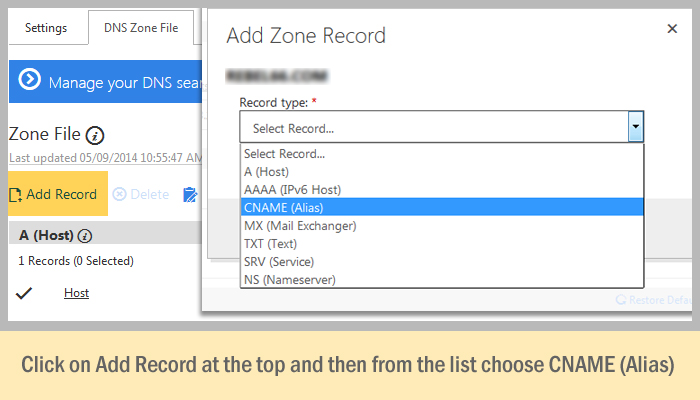
STEP 3 (IN GODADDY):
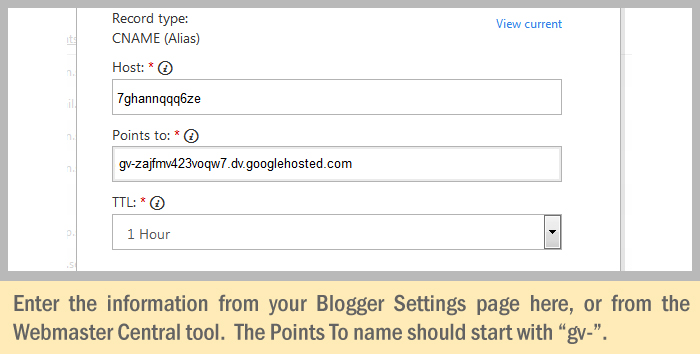
* The generated codes will be unique to you, so don’t type in the ones shown above. Instead, copy the ones that Blogger generated for you.
STEP 4:
Now you want to add “A Records” which prevent a 404 error page from appearing if a user leaves out the “www” on your URL.
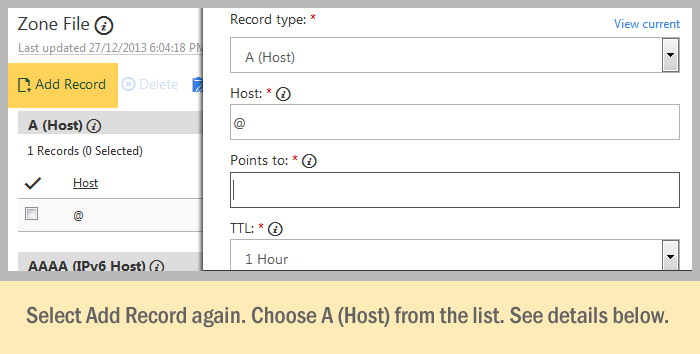
In the Host box, enter @ and in the Points To: box enter the first Google IP here:
216.239.32.21
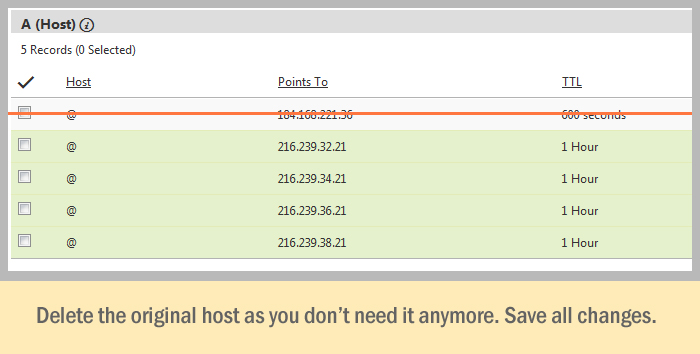
Save it and then do the same thing three more times, adding these IP addresses:
216.239.34.21
216.239.36.21
216.239.38.21
STEP 5:
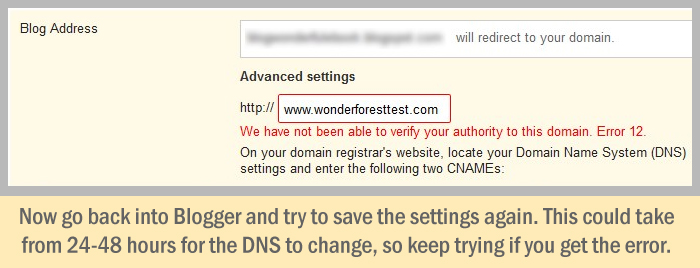
Remember: DNS settings can take up to 48 hours to change, which means if it’s not working right away, it’s not supposed to. Wait it out and keep checking back to see if the settings have applied. Your custom domain name should automatically direct traffic from your blogspot.com address to your new domain name.
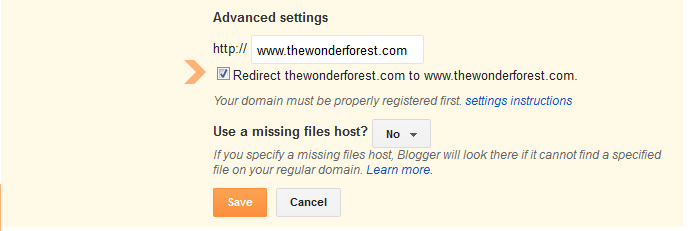
STEP 6:
After your URL is set up and working, click the Edit link beside your domain name on your settings page and make sure you check the above checkbox! This will prevent errors from happening when users leave out the “www” on your url.
Enjoy your new URL!