
Step by Step Add WordPress Blog In Your Magento Store
To start blogging with Magento website is never easy. There are so many blog extensions for Magento and you have to choose the best among them.
But the main question is whose reference you should take to create your Magento blog with WordPress plugin. It’s very difficult to change the default blog page design in Magento.
Today I am going to show you how to connect your Magento store with WordPress Blog Designer plugin. I’ll reveal the whole process in 4 easy steps. And it’ll take just 10 minutes to interpret. I have experienced some difficulties to setup all things as per described below but once it’s done successfully then I understood the power of blogging with my existing Magento website. So, I thought I should share this with the people who are looking for the blog with Magento site.
Why Must Every Magento Site Have A Blog?
Blogs play a huge role in publishing valuable information about news and offers, upcoming product news, customer feedbacks, etc.
It has great benefits from SEO point of view because through the blog you can do promotion and marketing on social media which in return draws good traffic on the website and eventually benefits of ranking higher in search listings.
WordPress blog provides you with basic features like categories, tags, comments, featured images, etc., where blog readers can play with your blog section. It also gives you the facility to change your theme design, improving blog functionality by adding some plugins, header and footer changes which suits your existing Magento store.
Now I am going to demonstrate the migration process from Magento to WordPress.
But before that, consider this:
You must have Magento 1.6.x, 1.7.x, 1.8.x or 1.9.x setup with Community Edition. And I will write down the same blog for Magento 2.x later once all R&D completed from our side.
Now, let’s move on to the final steps. I have finalized steps and that are listed below.
- Install WordPress integration Magento extension
- Setup WordPress configuration and select blog path
- Write down 2-3 dummy blog posts to check on front-end
- Install Blog Designer Lite/PRO plugin to add beautiful designs to blog
Starting from the first,
1. Install ‘WordPress Integration’ Magento Extension
First of all, say many thanks to Magento Commerce community that providing a WordPress integration extension. If you are not a regular user of this website then sign up first then logged in with the site to download your free copy. You need to press on “Install Now” button to select your Magento Connect version. We have selected here Magento Connect 1.0 with the dropdown selection. See below image for more details.

2. Setup WordPress Configuration And Select Blog Path
Now, set up your downloaded extension file with your Magento setup. Below one is very basic steps to install Magento extension with your Magento setup.
- Download the .zip/.tgz file
- Extract the contents of the .zip/.tgz file to your root folder
- Log in to Admin Panel
- Now, you can see a menu named ‘WordPress’
- Clear Cache and Login again if you are not seeing that menu item
Please go to WordPress > Setup Menu to do further remaining steps to start blog section.

Read each and every setting carefully and do those settings one by one. You can also get an idea from below image. That may be more useful to you with backend panel screenshot.

Now, you are done with all WordPress Integration Extension settings. It’s time to start playing with your new WordPress panel. If you have setup your blog path same like above image then you can access your WordPress frontend via http://your_magento_path/blog link.
And if you want to start any update with backend settings then try to access this link – http://your_magento_path/blog/wp-admin
3. Write Down 2-3 Dummy Blog Posts To Check On Frontend
Writing Posts is a good practice as you can write some blog posts with WordPress. Create posts, categories, tags. etc. I think, now you are done with all WordPress basic steps – how to publish a new blog post, how to comment on existing blog posts, etc. More advanced, site owner can create number of users, give them role with capabilities and much more!
4. Install Blog Designer Lite/PRO Plugin To Add Beautiful Designs To Blog
Choose the best blog design, it’s our main moto now! WordPress has lots of themes and plugins as a free and premium where you can select any one and can continue your newly created blog section. But think, if you would like to change the design of blog section then it will be again a more difficult question for us. We have already created a solution for all blog lovers. 40K+ users are already using our free solution with WordPress sites and there are 1500 users are using PRO version of Blog Designer.
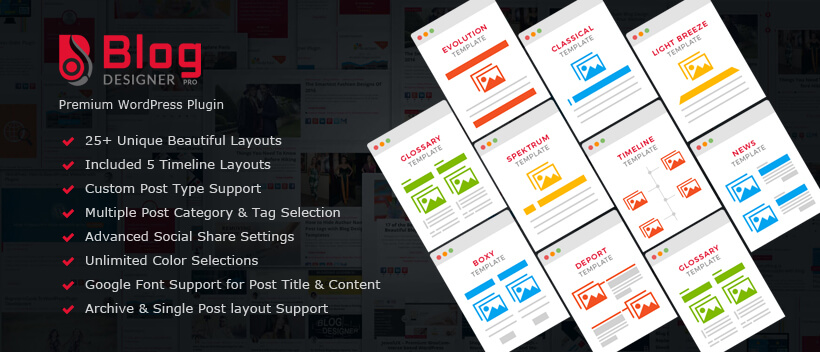
We are highly recommending to use Blog Designer PRO version for everyone because it will remove all your limits with the new blog section. You no need to worry about if you are not more familiar with WordPress, CSS, jQuery and HTML or if you haven’t idea about how to customize current blog design.
Blog Designer PRO is an all-in-one and powerful tool for any kind of WordPress blog websites. There are 26 unique and beautiful blog templates that will fulfill the requirements of any blog page. It comes with amazing Timeline templates and advanced benefits.
Where Blog Designer WordPress Plugin Is Useful In Your Magento Website?
- To start a new blog section
- Business & Technology idea sharing
- Sharing your company story and achievement(timeline)
- Company new product updates
- Latest fashion ideas and offers
- Latest finance trends before purchase an item
- Online shopping tips & tricks